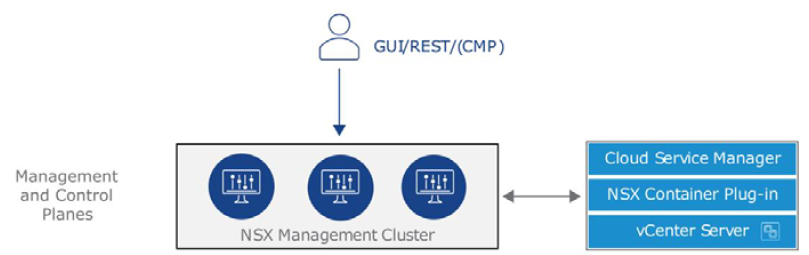
In a previous blog post, NSX-T architecture explained and now we can start implementation of NSX-T. Deployment process of NSX-T Data Center beings with deployment of NSX-T Management cluster. In NSX-T 3.0 management cluster is consist of three NSX-T managers which include both management and control plane. The management plane provides Web UI, REST API and also interface to other management platforms like vCenter Server, vCloud Director or vRealize Automation. The Control plane is responsible for computing and distributing network run time state.
NSX-T managers can be deployed on ESXi or KVM hypervisor. If you are planning to use ESXi platform to host NSX-T managers, an OVA file should be used. On the other hand for KVM platform, a QCOW2 image will be used for NSX-T manager deployment. It is important to note that mixed deployments of managers on both ESXi and KVM are not supported. Based on type of deployment and size of environment, NSX-T manager node size configuration should be selected. Following is the four different configuration options and their requirements.
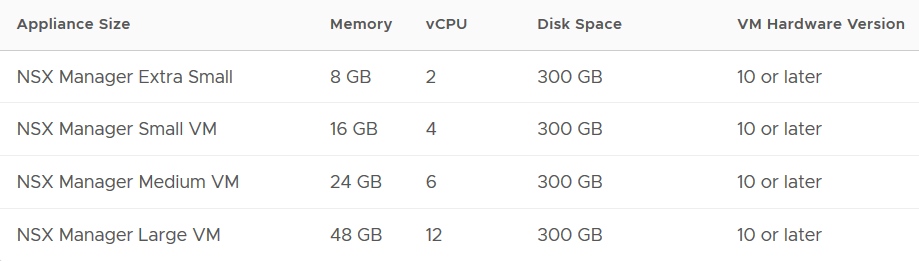
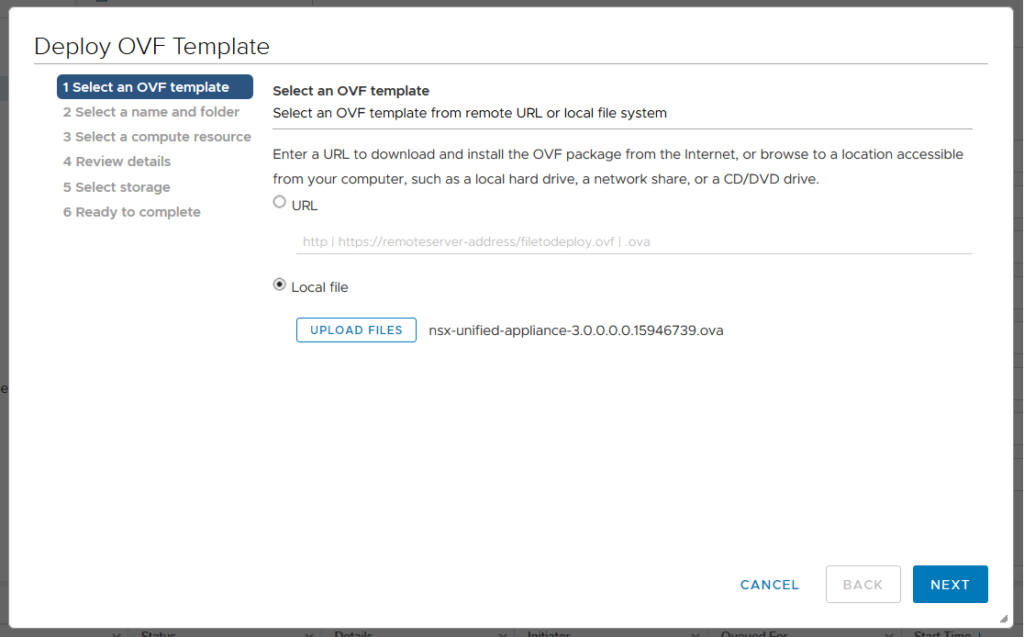
Extra Small configuration should only be used for Cloud Service Manager for NSX Cloud deployment. Small configuration is only fits for lab and proof of concept deployment. In production deployments if number of hosts are up to 64 hypervisors, use Medium configuration and for large scale deployment with more than 64 hosts use Large form factor. To start the deployment process first download OVA image from VMware website , run OVF template from vCenter server and select downloaded file.
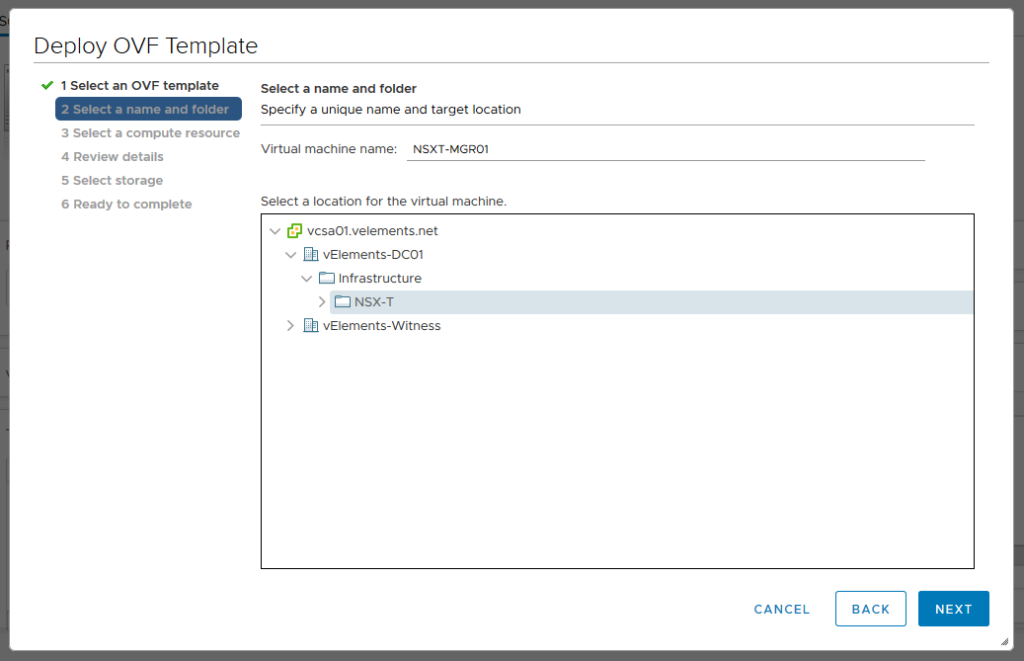
In the next page, name first NSX-T manager and choose the target VM location for storing the manager.
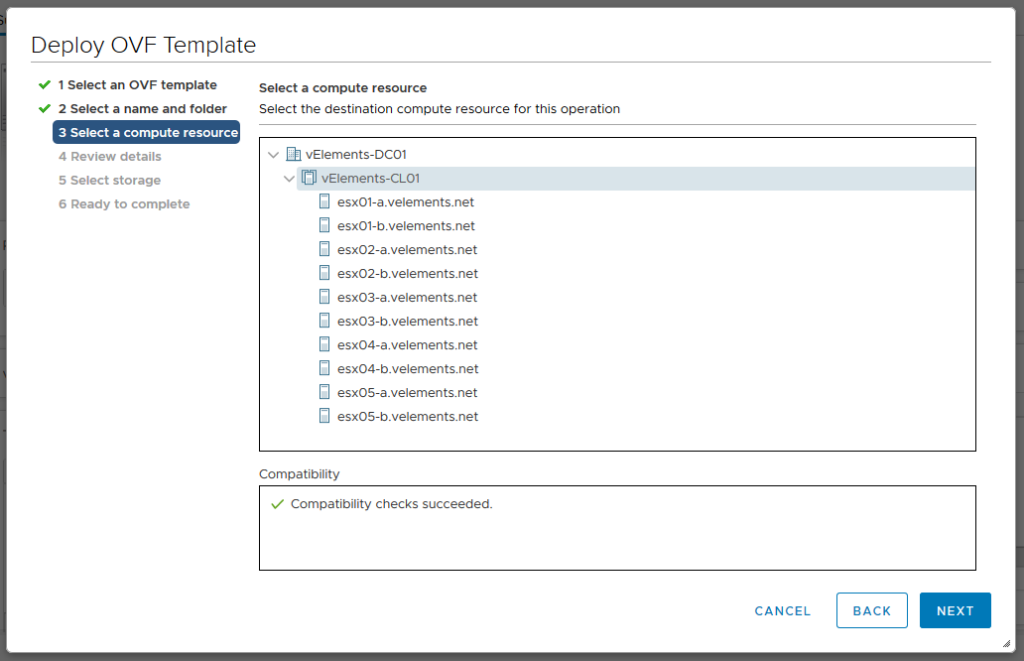
Choose the cluster of ESXi that you want to host NSX-T Manager. If you have dedicated Management Cluster, choose that cluster for this deployment.
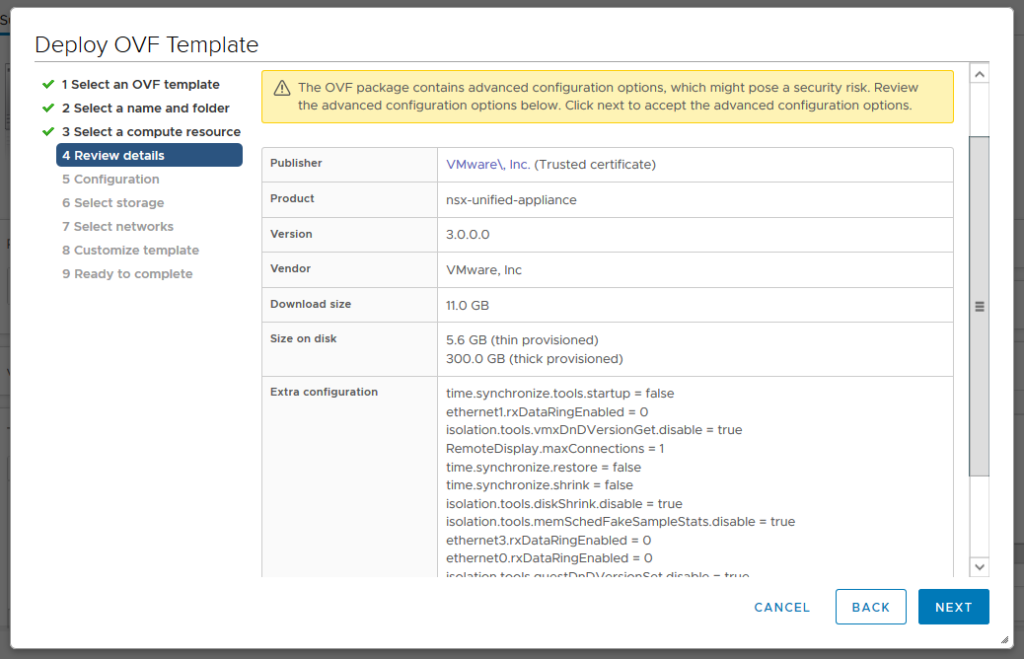
In the next page review the deployment details.
Based on the type and size of deployment choose NSX-T Manager node size. Because I am running this deployment in a Lab environment, I chose Small but if it is production deployment choose Medium or Large configuration.

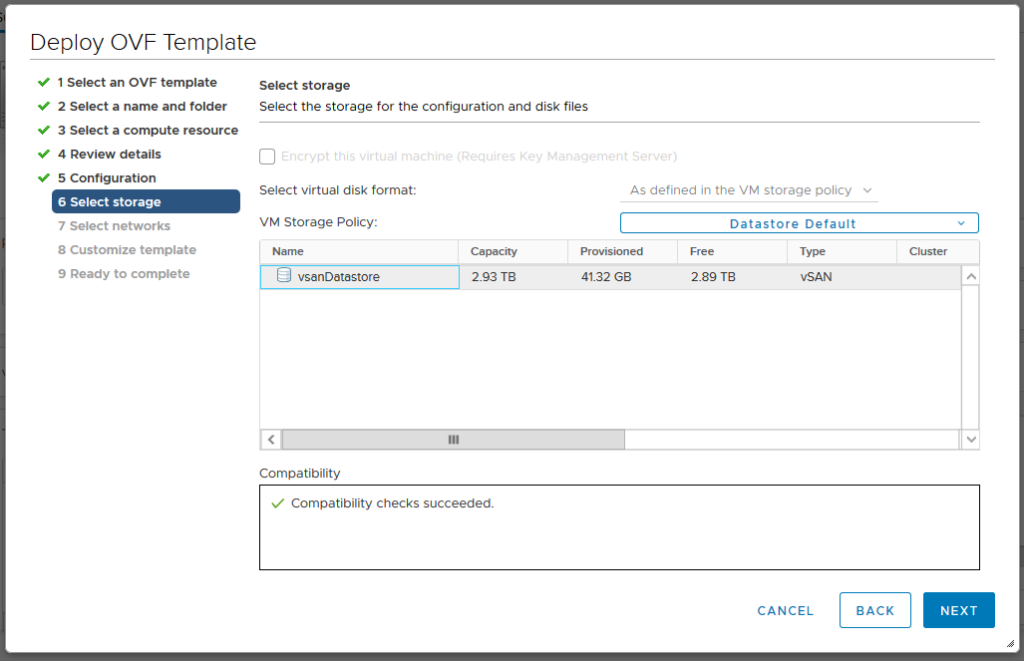
Choose the destination datastore for this deployment. It is important to select a shared storage with access latency of under 10ms.
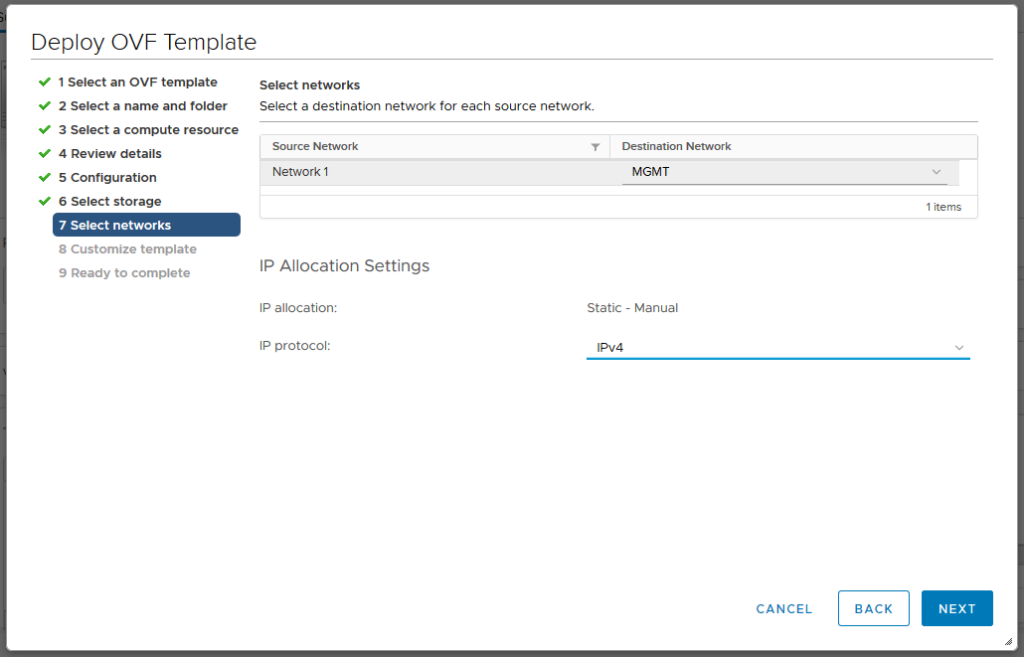
For network connection of NSX-T Manager choose the right VM port group. NSX-T Manager usually connected to management network.
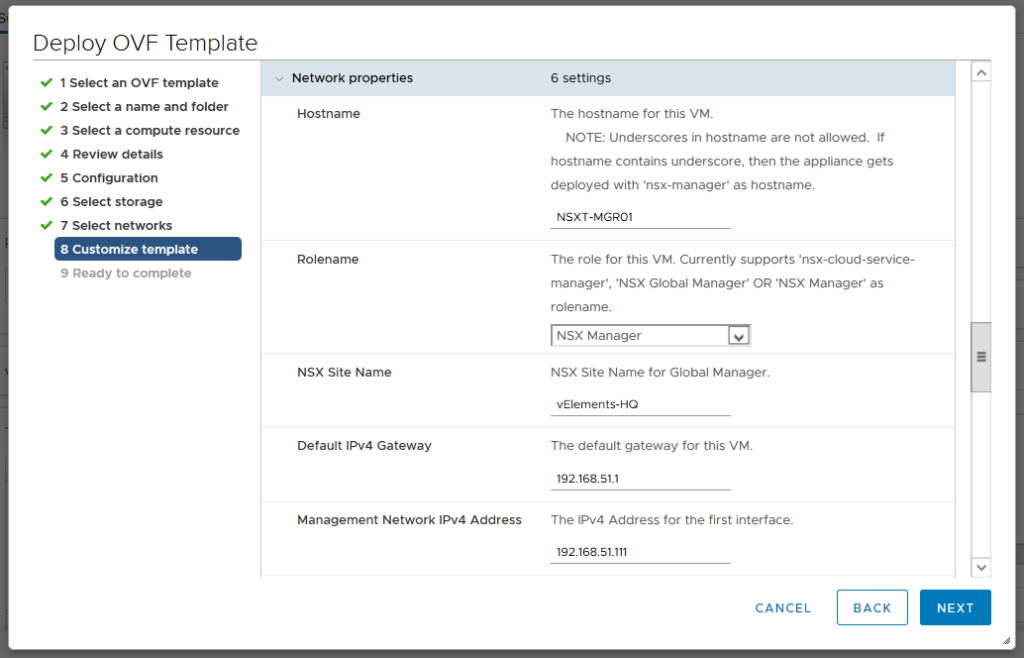
In the next page configure admin, root and audit password and also enter network configuration of first NSX-T Manager. Here DNS and NTP configuration is very important. make sure to have A and PTR record in place for first NSX-T Manager node and have the time sync between virtual infrastructure components through use of NTP server.
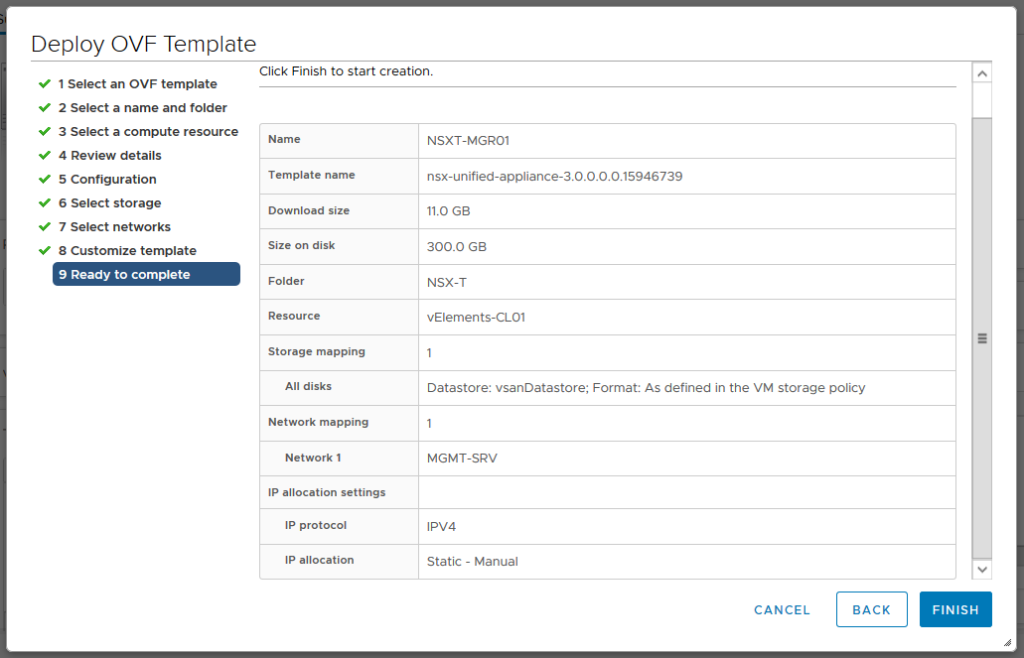
Finally review the configured details and press Finish to start the deployment process.
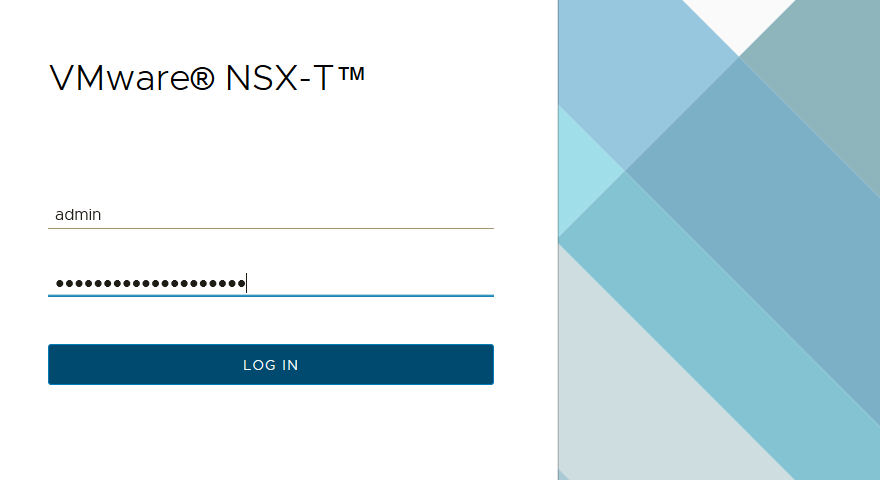
After successful deployment of first manager, make sure that the appliance is powered on and booted successfully. You can use the configured IP address and login to Web UI with admin user and configured password.
In the next blog post we are going to configure Compute Manager and complete the Management cluster with two more NSX-T Manager nodes.
3 thoughts on “Deploying NSX-T Management Cluster”