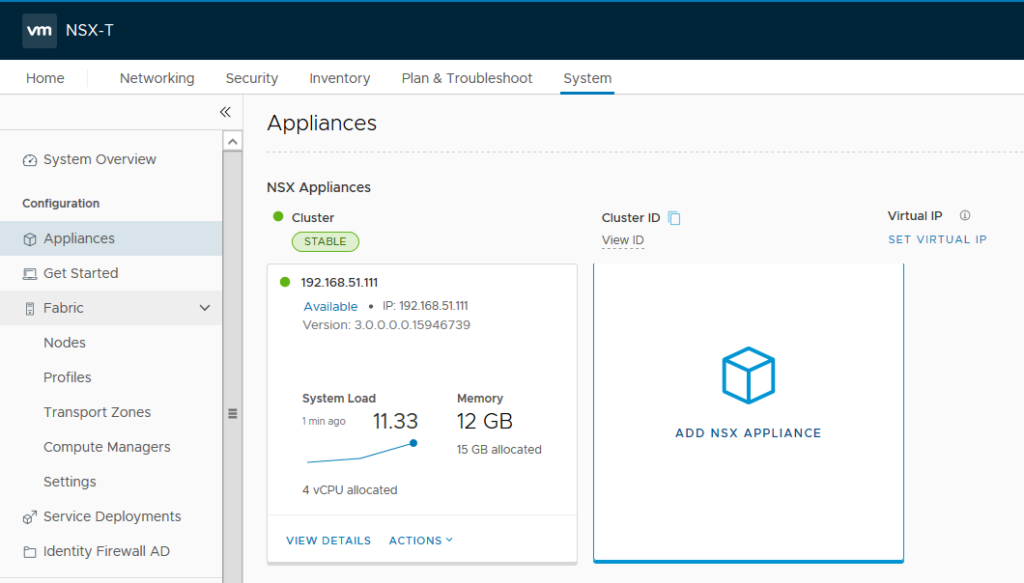
In the previous articles, we deployed first NSX-T Manager and then we added vCenter Server as Compute Manager in NSX-T Web UI. In this post we are going to finalize NSX-T Management cluster. In production environment for high availability and performance reasons, it is recommended to have three NSX-T Managers in the cluster. Second and third NSX-T Managers should be added from NSX-T Web UI. To deploy additional NSX-T manager appliances, go to System menu and choose Appliances and click on “ADD NSX APPLIANCE”.
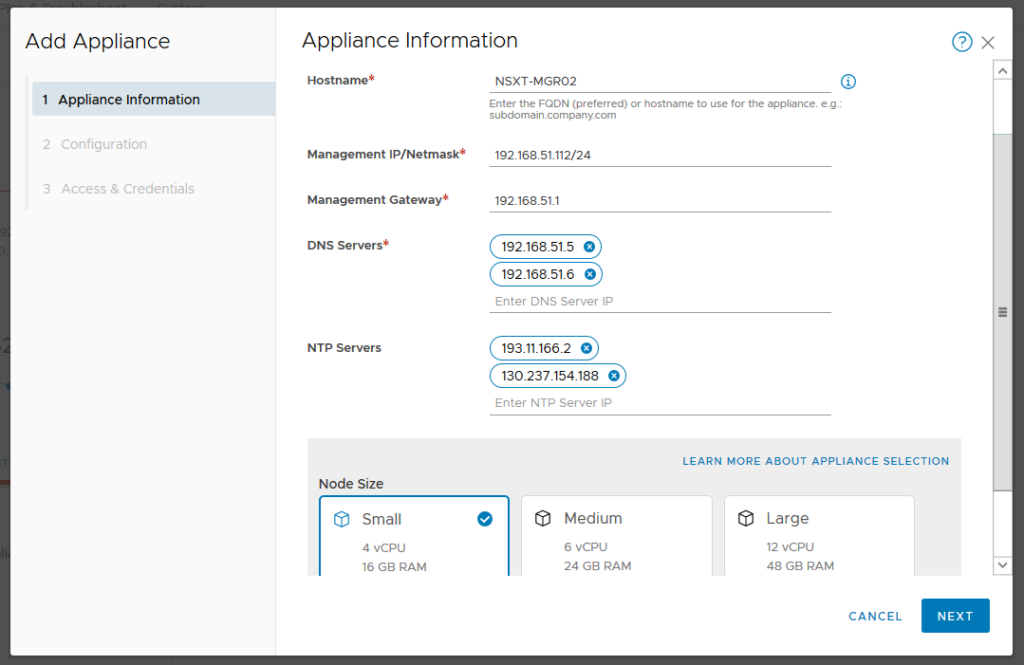
On the configuration wizard enter hostname, IP address, DNS servers and NTP servers information. And on the bottom of this page choose the appliance size. It is recommended to choose the same Node Size as the rest of NSX-T managers. Since I am working on a lab environment, I choose Small node size for this deployment.
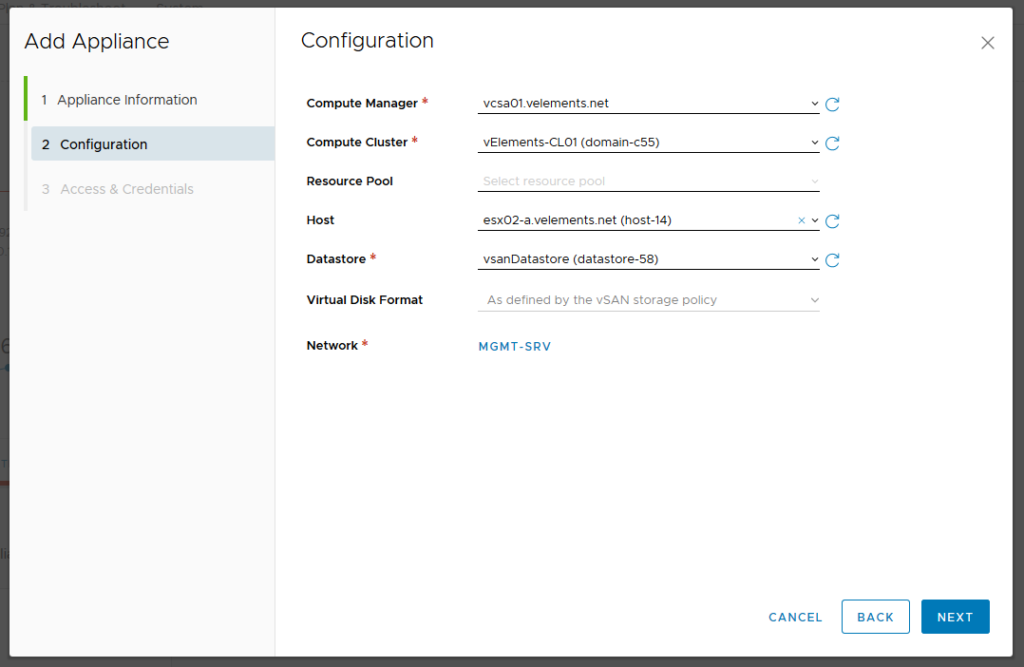
On the next page choose Compute Manager(vCenter Server), vSphere cluster, datastore and network port group for NSX appliance deployment.
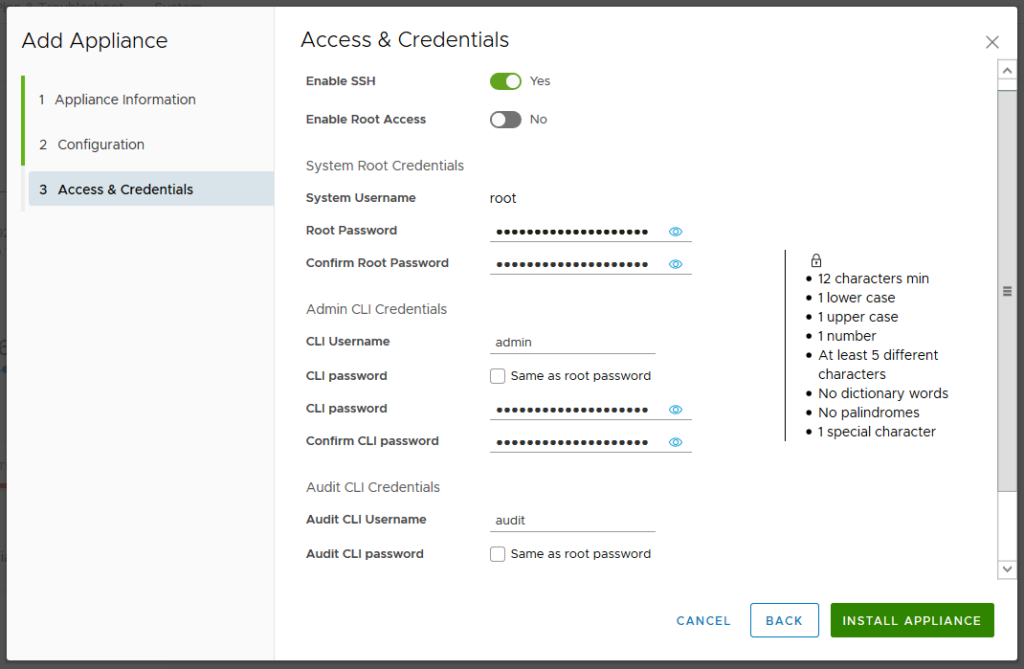
On the Access & Credentials page you have the option to enable SSH and enter password for root, admin and audit user accounts. Here I choose not to enable SSH for root account. Click on Install Appliance to start NSX-T manager installation.
After the appliance is deployed successfully, give it some time to appear as Available in the UI. You can now repeat above procedure to deploy third NSX-T manager and finally you will see all three managers as Available and Cluster status should be Stable.

You can also verify NSX-T cluster status, run the following command through SSH connection to one of the managers.
> get cluster status
In the next bogpost we are going to configure a Virtual IP (VIP) address on this cluster so there would one connection point into the management cluster.
2 thoughts on “Finalizing NSX-T Management Cluster Deployment”