NSX-T installation comes with a out of the box self-signed SSL certificate. Because of security and compliance reasons, most of customers want to replace default self-signed certificate with a CA signed certificates. We have been looking for guide that explains how to do this step-by-step but unfortunately we couldn’t find one! There are some very useful guides like this one from VMware but as you read through, you realize the documentation is not complete. So to make story short, we looked around and ran SSL certification replacement.
The whole process can be divided into following steps:
- Certificate Preparation
- Certificate Request
- Certificate Replacement
In first part, we are going to cover step 1 and 2 which prepare the PKI infrastructure and request the certificate. In second part we are going to Import, verify and replace the CA signed certificate.
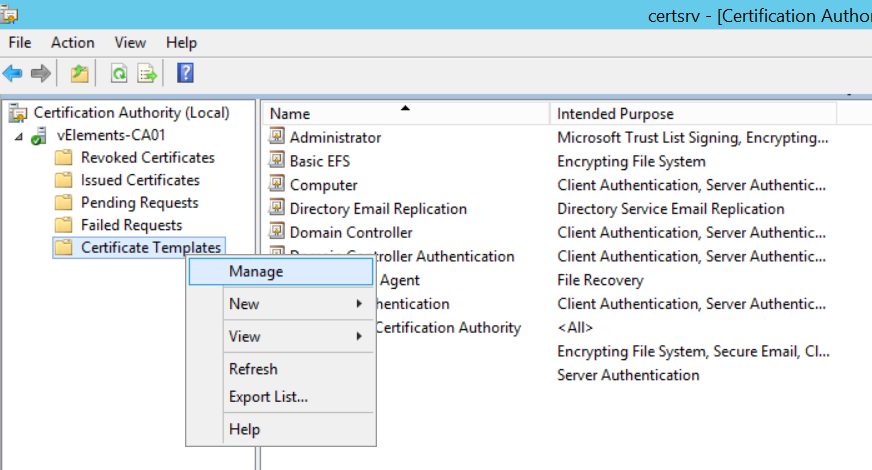
So let start with first step to prepare the certificate. In most of our engagements customers are using Microsoft based Certificate Authority(CA) so because of this we decided to run it with a Microsoft CA. First, we need to prepare Certificate Template. You can do this with duplicating a default Web Server certificate and make some minor changes to it. On your CA, open Certification Authority snap-in , right click on Certificate Template and choose Manage.
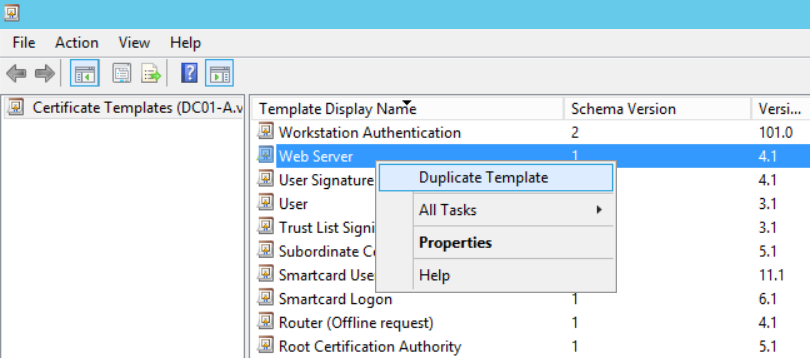
In the Certificate Templates snap-in right click on Web Server and choose Duplicate Template option. With this we are going to create a specific template for our NSX-T use case.
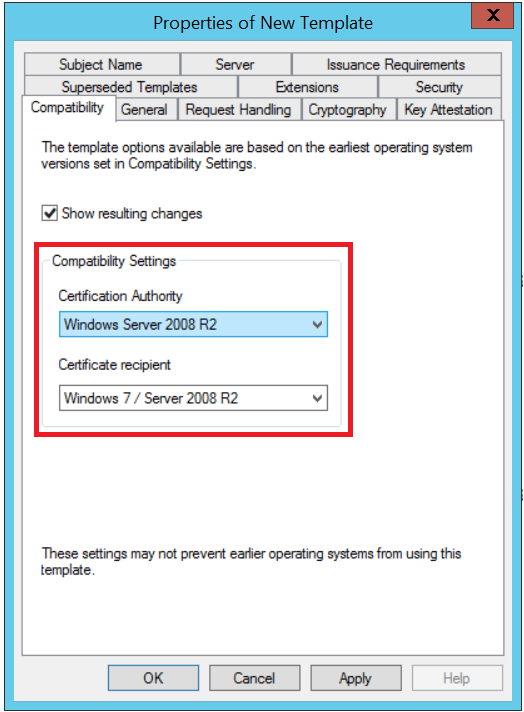
First you need to change the Compatibility Settings for Certificate Authority to Windows Server 2008 R2 and Certificate recipient to Windows 7/ Server 2008 R2. This is necessary because of Basic Constraints configuration.
Next go to extension tab, choose Basic Constraints, click Edit and make sure to select Enable this extension. If you don’t enable this option, later when you try to verify the imported certificate you will get an error. The error state “Certificate is not compliant as certificate of type SERVER: Basic constraints Extension is not present in the certificate.”

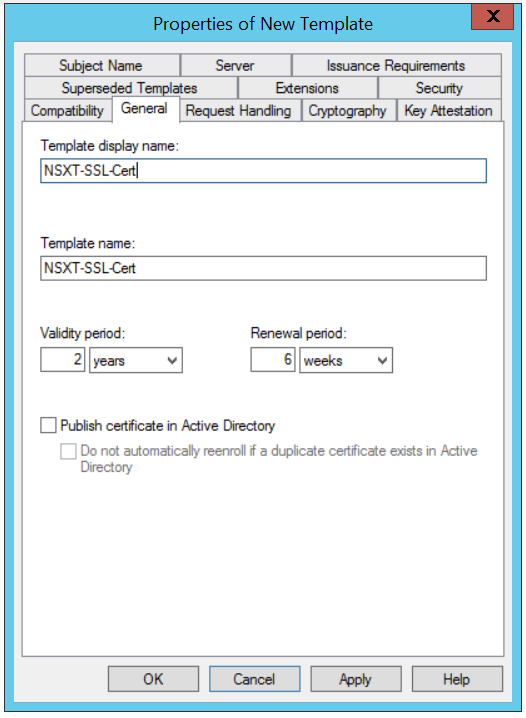
Now go to General tab and name your certificate and press OK to save the new template. We named the new template NSXT-SSL-Cert.
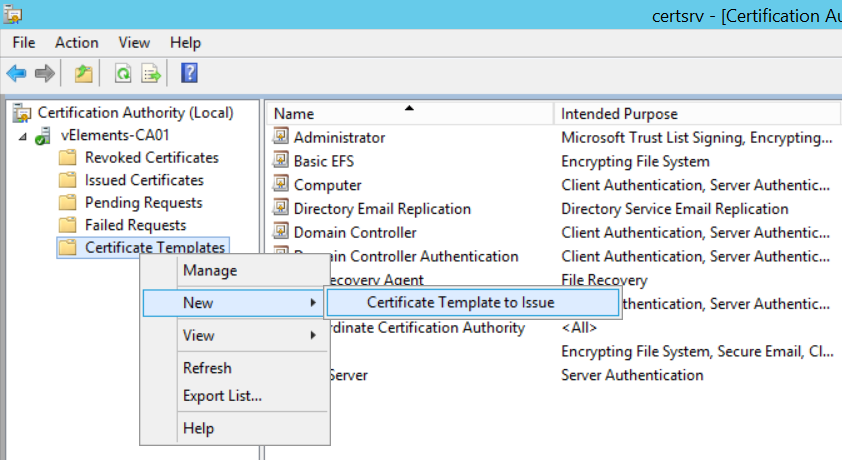
After all to make the new template available for request and issue, go back to Certification Authority template, right click on Certificate Template, choose New and select Certificate Template to Issue.
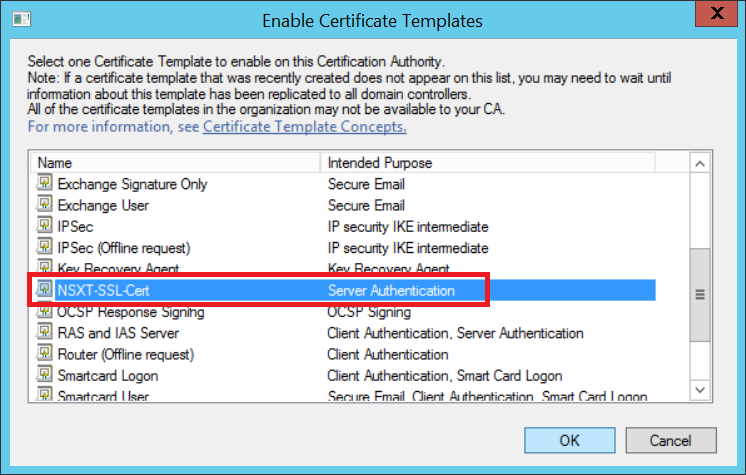
In the Enable Certificate Template page, select the template created in the previous step.
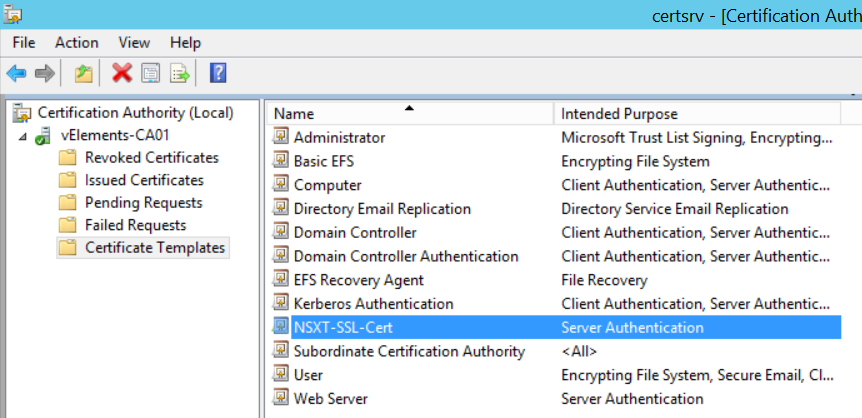
Now the certificate template should be listed in the template list and ready to request and issue afterwards.
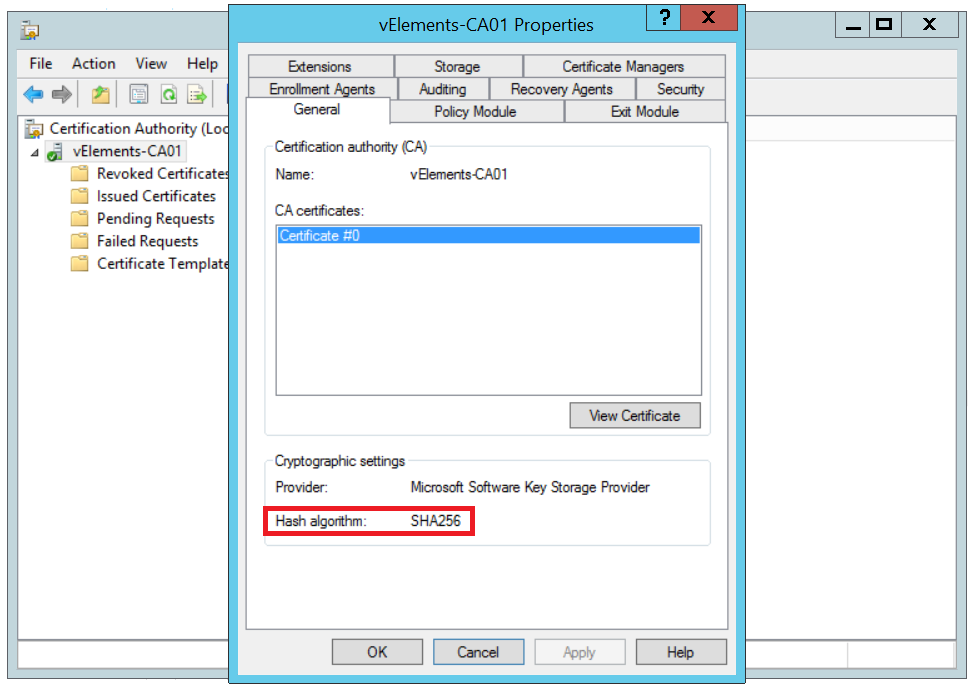
Before moving on to the next step, just a small verification of your Microsoft CA. Make sure your CA is configured with SHA256 Hash algorithm and not SHA1! If you miss this step, later when you try to verify the imported certificate you will get an error. The error state “Certificate does not use supported signature algorithm.”
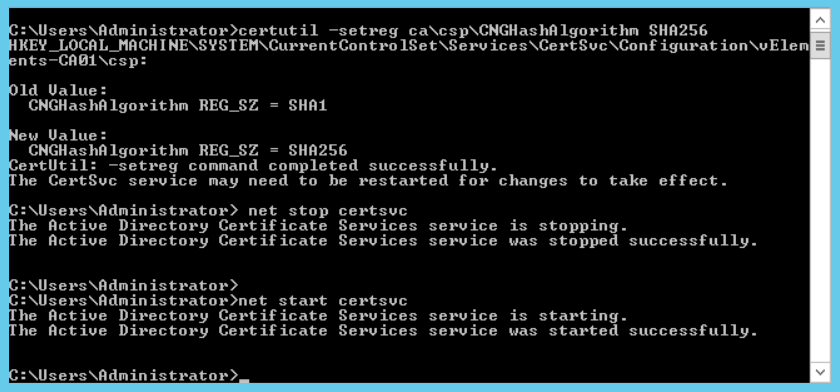
If your CA is configured with SHA1 hash algorithm, you can upgrade the algorithm with this instruction. What you should basically do is to run Certutil command and then restart the certificate service.
Now having the certificate template ready, we can go ahead and prepare the CSR for the certificate request. There two options to generate CSR for NSX-T. First one is to use CSR Generator from NSX-T Manager WebUI which is the easier option but since it does not support SAN properties will have some issue with Chrome browser. The second option is to create a .cnf file manually and create the CSR with use of OpnSSL. We decided to go with the second option.
Below is the template for creating the .cnf file. Use this template and change the values based on your environment. One thing that is important is to use FQDN for commanName and DNS.1 keys. Because we are using a VIP for NSX-T Management cluster, we used VIP’s FQDN for this .cnf file. Copy paste below test into a notepad, modify the values and save it with .cnf extension.
[ req ]
default_bits = 2048
distinguished_name = req_distinguished_name
req_extensions = req_ext
prompt = no
[ req_distinguished_name ]
countryName = COUNTRY-INIT
stateOrProvinceName = STATE
localityName = STATE-INIT
organizationName = NSX
commonName = VIP-FQDN
[ req_ext ]
subjectAltName = @alt_names
[alt_names]
DNS.1 = VIP-FQDN
To generate a CSR from this .cnf file we should use OpenSSL. Use the following execution command to generate CSR and private key from .cns file. Because we named .cnf file as nsxt-vip.cnf , we ran the command as below.
openssl req -nodes -newkey rsa:2048 -keyout nsxt-vip.key -config nsxt-vip.cnf -out nsxt-vip.csrAfter running OpenSSL command, two file should be generated. One CSR which will be used to submit the request to CA and corresponding private key(*.key) that we use when importing the certificate into NSX-T WebUI.

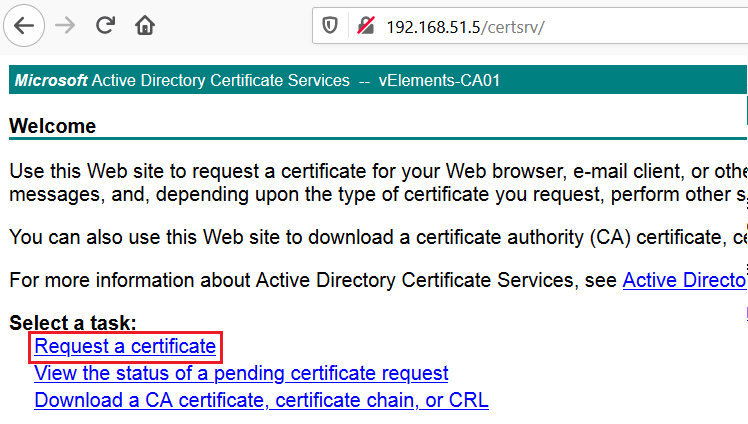
To submit the certificate request, open browser and point to Web Enrollment page of your CA. First Log-in and then choose Request a certificate from the first page.
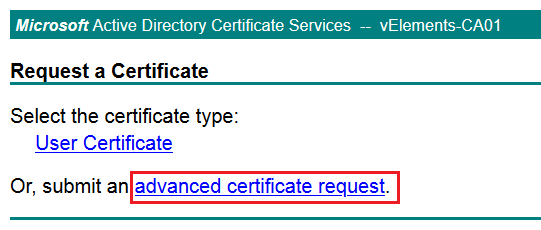
On the next page choose “advanced certificate request”
On the next page copy paste the content of CSR file and choose the right certificate template that has been created previously.
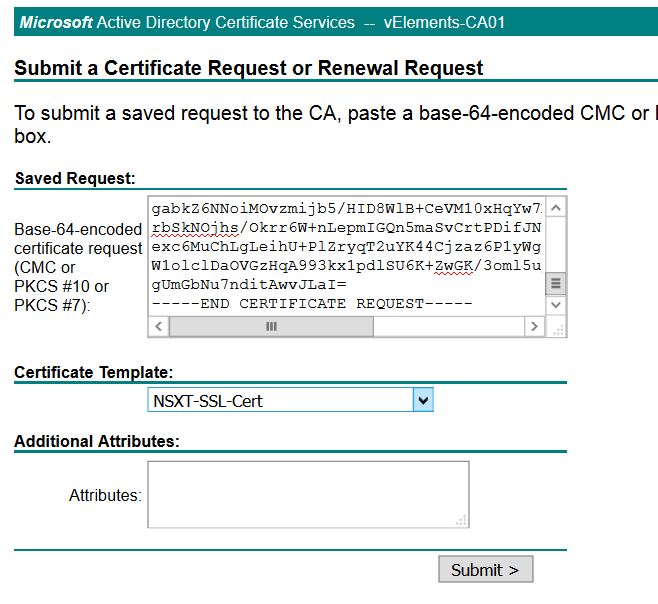
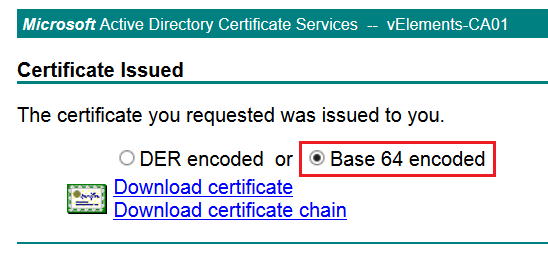
Submit the request and after it issued, download certificate chain based on Base 64 encoded version.
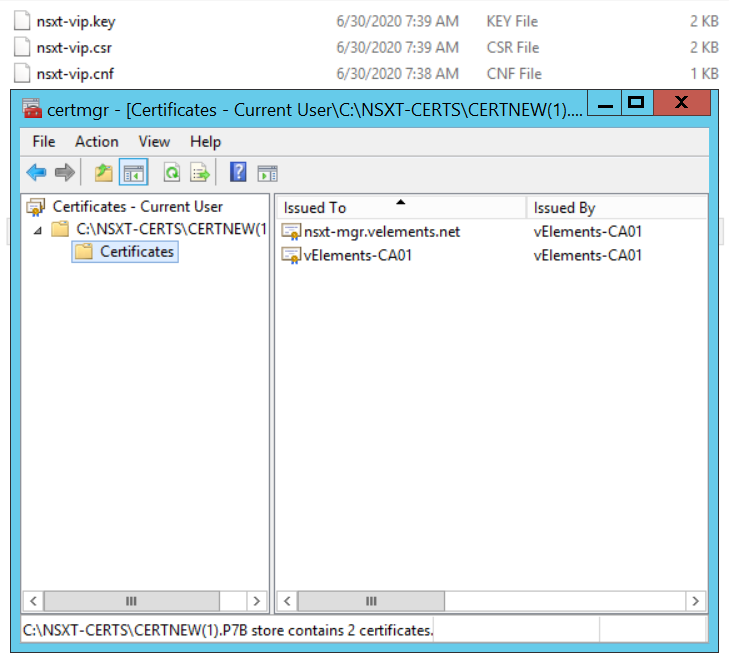
It is really important to download the whole certificate chain because you need it when importing the certificate in NSX-T WebUI. After downloading certificate chain open .p7b file and check if all the certificate are in place.
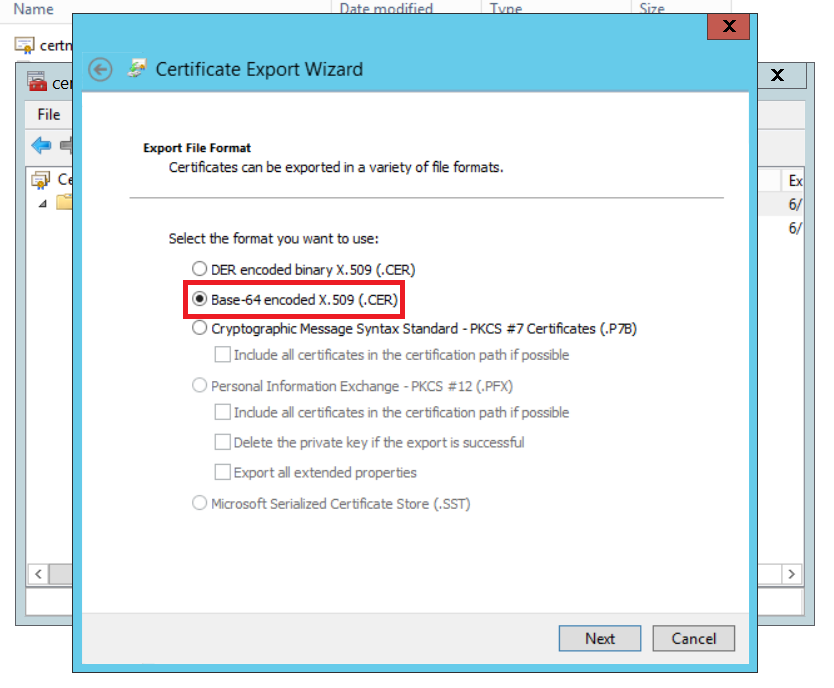
We should export both certificates with Base-64 encoded X.509 now. Select each certificate one-by-one, right click, choose All Tasks and then Export. As it mentioned make sure to select Base-64 encoded X.509(.CER) as export format.
So after all this effort, we are done with certificate preparation and request. In Part 2, we are going to verify, replace and test the generated certificates.
3 thoughts on “NSX-T 3.0 SSL Certificate Replacement – Part 1”