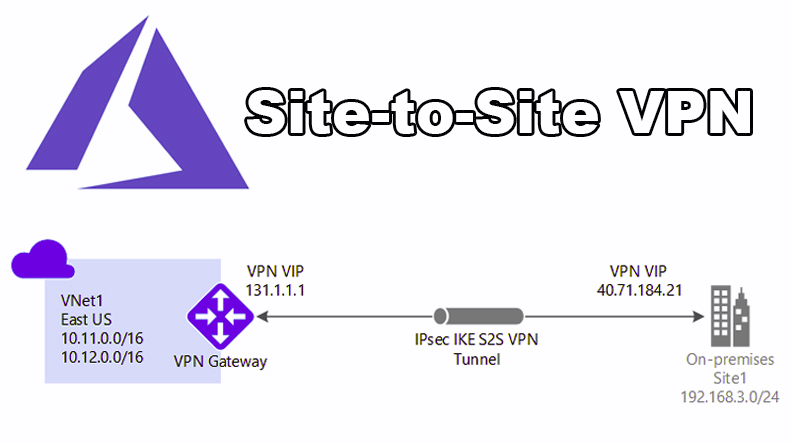
Design and implement a hybrid networking infrastructure is part of every cloud adoption project. Organizations planning to embrace public cloud services and migrate resources to Azure usually need communication channels between the on-premises environments and Azure. One of the widely used technologies that provide the required communication channel is Site-to-Site Virtual Private Network (S2S VPN). To deploy such a communication channel, you will set up a VPN IPSec tunnel between an On-premise gateway and Azure VPN gateway. As part of the Azure AZ-700 Study Guide, in this blog post, we are going to explorer Azure S2S VPN
The VPN Gateway on Azure uses IPSec as authentication and encryption protocol. IPSec has the role of exchanging data securely with the help of encryption over a public network like the Internet. To initiate the encrypted tunnel, IPSec uses Internet Key Exchange(IKE) protocol to negotiate and set up the VPN tunnel. By using IKE, both parties agreed-upon keys and algorithms to be used for establishing a VPN tunnel. There are two versions of IKE available. The initial version, version 1, was introduced in November 1998 by IETF. In September 2010, IETF released IKE v2, which has the following security and performance improvements;
- IKEv2 supports EAP authentication & Asymmetric authentication.
- In IKEv2, Tunnel endpoints exchange fewer messages to establish a tunnel.
- IKEv2 has Built-in NAT-T functionality which improves compatibility between vendors.
- IKEv2 is reducing the required bandwidth as VPNs grow to include more tunnels between multiple nodes or gateways.
- IKEv2 is more reliable as all message types are in the form of Request and Response pairs.
It is recommended to use IKEv2 if both VPN gateways support it.
In general, we need to go through the following steps to set up the S2S VPN tunnel between your On-Premises site and Azure.
1- Create a Gateway Subnet inside the destination vNet in Azure.
2- Deploy Virtual Network Gateway (Azure VPN Gateway)
3- Create Local Network Gateway
4- Create the VPN Connection
5- Configure your On-Prem VPN Gateway
6- Verify the VPN tunnel status & connectivity
Let’s go through the process, step-by-step together!
Create a Gateway Subnet
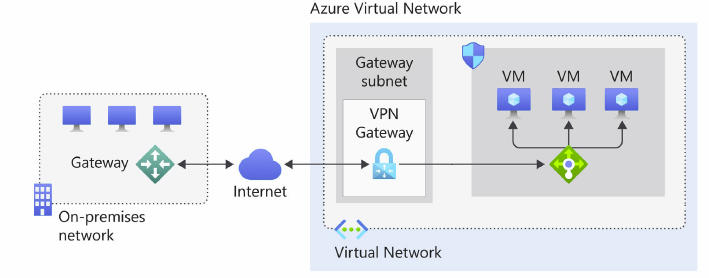
During the creation of Azure VPN Gateway, gateway VMs are deployed into Azure vNet that needs to connect to the VPN tunnel. The gateway VMs require a subnet for their network connectivity. Because of this, we need to create a specialized subnet called “Gateway Subnet” before deploying Azure VPN Gateway. As with any other subnet, Gateway Subnet needs an IP address range inside vNet’s Address Space. We can create a gateway subnet with an address range as small as /29. Still, it is recommended to use /27 or larger subnet sizes to ensure enough IP addresses are available to accommodate future growth. So plan for the IP address range before starting the Gateway Subnet creation.
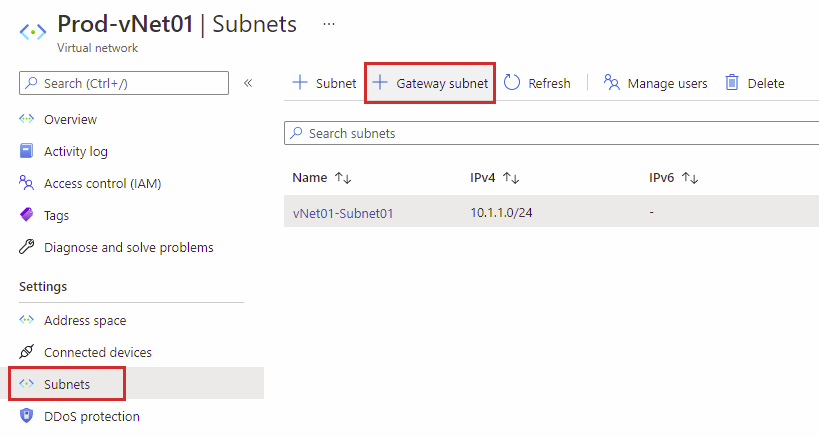
To create the Gateway Subnet through Azure Portal, we must first select the vNet that needs to be connected to the VPN tunnel. Then, under the Settings menu, choose Subnets and then select Gateway Subnet.
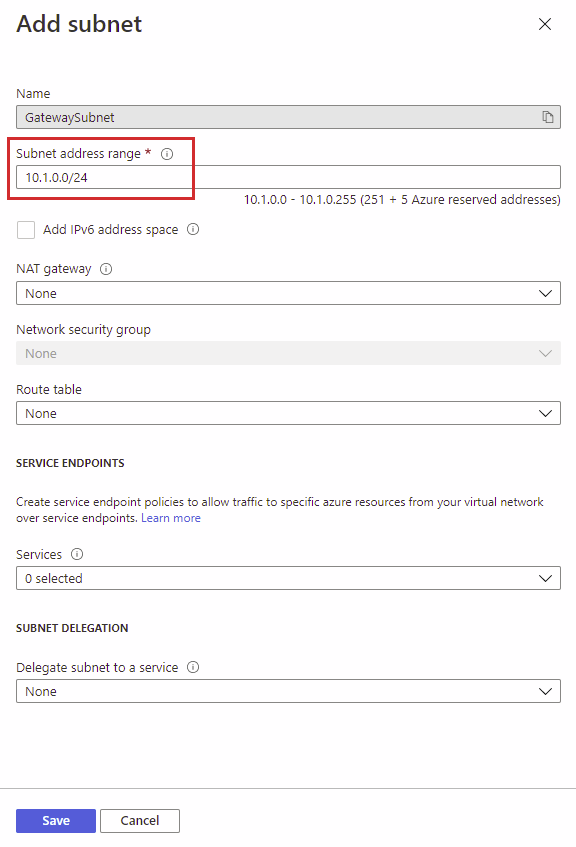
On the Add Subnet page, as you can see, the name is set to GatewaySubnet, and it is grayed out. This way, the name of the subnet clarifies its purpose. Next, you need to assign a Subnet address range. For example, the Prod-vNet01 has an address range of 10.1.0.0/16, and I plan to subnet this range with /24 networks. Therefore, I assign 10.1.0.0./24, which is the first subnet as the address range. For now, I don’t configure any of the other settings like IPv6, NAT, or Services.
Deploy Virtual Network Gateway (VPN Gateway)
After creating the GatewaySubnet, we can continue with deploying the Virtual Network Gateway or the VPN Gateway. But before we start building the virtual network gateway, we need to discuss some points. First, we have two types of gateway, VPN and ExpressRoute. Choose VPN if planning to implement S2S VPN or P2S VPN. Select ExpressRoute if planning to use ExpressRoute as the connectivity method. We will discuss P2S VPN and ExpressRoute later in blog posts. Second, there are also two types of VPN gateway available, Route-based and Policy-Based. PolicyBased VPNs, or Static Routing Gateway, uses a combination of address prefixes and a policy traffic selector usually defined as an access list to forward the traffic. On the other hand, RouteBased VPNs or Dynamic Routing Gateways use routes in their forwarding table to forward traffic. Due to the limitations of PolicyBased VPN gateways, it is recommended to use Route-Based gateways in most of the use cases.
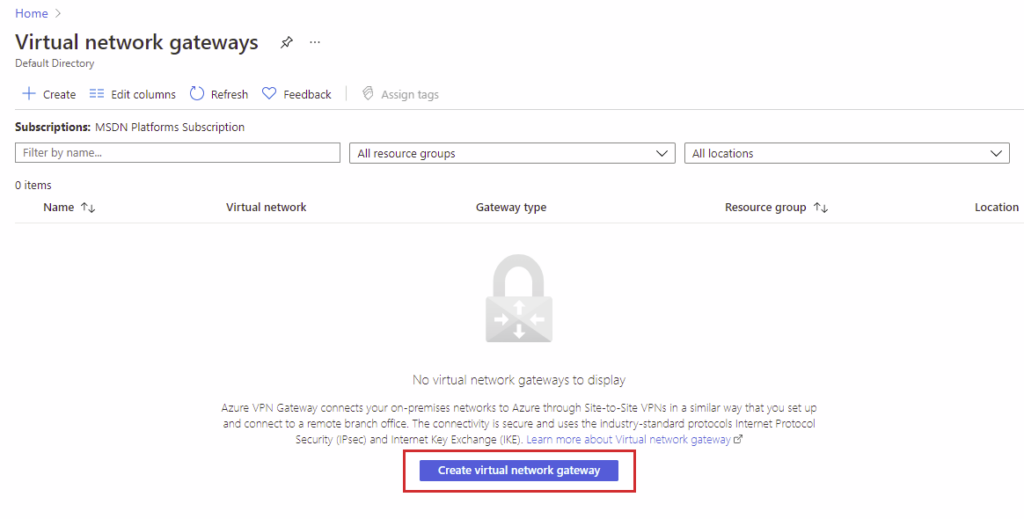
To deploy VPN Gateway, create a resource search for Virtual network gateway and then choose the Create virtual network gateway option.
On Create virtual network gateway page, Choose the correct subscription, name the gateway and select the right Region. The Region should be chosen based on your vNet’s configuration. As you can see, I choose West Europe because the Prod-vNet01 is located in West Europe. There are various gateways SKUs that you can choose from, and they affect the functionality, throughput, and the number of concurrent supported tunnels. You can read more about Gateway SKUs on the Microsoft documentation page. I choose VpnGw1 because it is scalable, supports configuring BGP and Route-based VPN type. Finally, this gateway needs a Public IP address to be referenced and contacted by an On-Premises gateway.
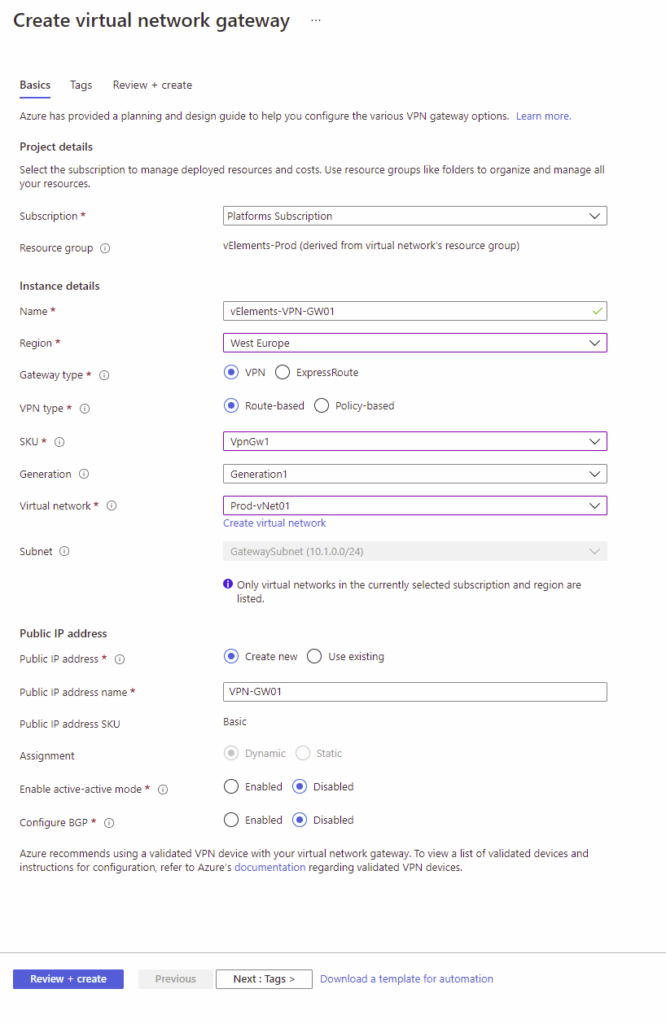
After filling out the required option on the above page, click on Review + Create, and the deployment process takes around 45 to 60 minutes. While the deployment process works in the background, you can continue with the next step.
Create Local Network Gateway
The local network gateway is typically referencing the On-Premises locations. So it points out the public IP address of the On-Prem VPN gateway and the IP address space range used on your On-Premises environment. If you are using BGP because of the high availability options, you can also configure it here.
To create a local network gateway, on the create a resource page, search for Local Network Gateway and then choose the Create local network gateway option.

After configuring the Local Network Gateway, we should wait for the successful deployment of the Virtual Network Gateway. After this, we can continue with the last step of the S2S VPN configuration on the Azure side.
Create the VPN Connection
Once the Virtual Network Gateway and Local Network Gateway are created, we can build the VPN connection. In the VPN connection, we configure the properties of the connection. For example, Pre-Shared Key(PSK), IKE version, and type of connection can be configured.
To configure the VPN connection, choose the Virtual Network Gateway, select Connections, and select Add under Settings.

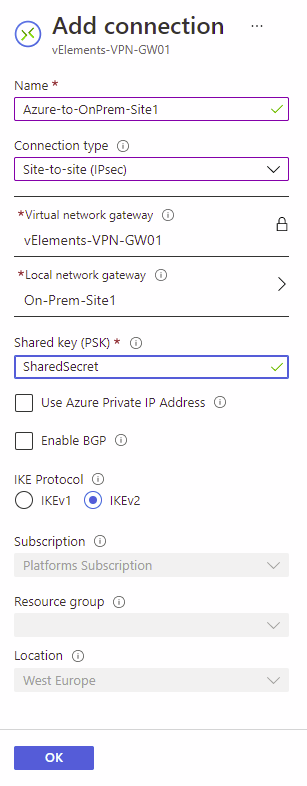
On Add connection page, name the connection, choose Site-to-Site(IPSec) as the connection type, and configure your Shared Key(PSK). You should also make sure that the correct Local network gateway and IKE version are selected. After completing all the required options, go ahead and click on OK.
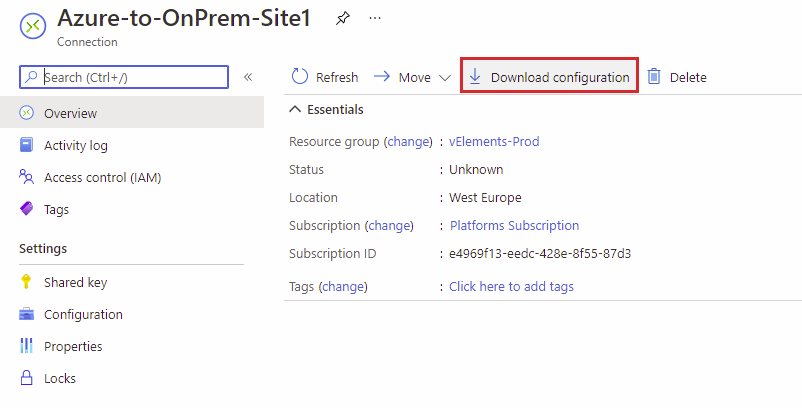
If you go to the Connection page on the Overview, you have the option to Download configuration. This file can help you configure your On-Prem device, which we will discuss in the next section.
Configure your On-Prem VPN Gateway
Now is the time to configure your On-Prem VPN gateway to complete the setup. First, you need to observe the Public IP address of the Azure VPN gateway, configure Shared Key(PSK) and IKE protocol settings before configuring the On-Prem VPN gateway. This step is dependent on your VPN gateway type, and please refer to your VPN gateway’s vendor documentation.
Verify the VPN tunnel status & connectivity
When you configured both Azure VPN gateway and On-Premises VPN Gateway completely, the connection status should be turned to Connected. To check the connection status, go to the connection page and select Overview, and Status should be visible under Essentials.
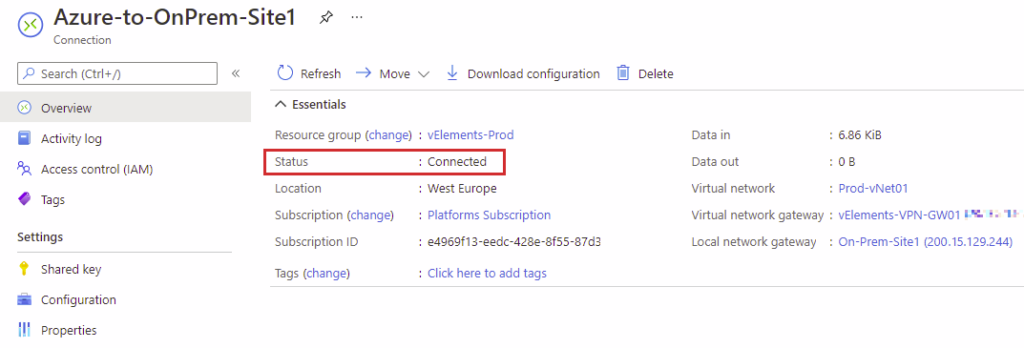
In the case of Not Connected status, you should first check the public IP address referenced on both sides. Next, you should check the configured Shred Key, which should be precisely the same on both sides. Finally, if everything looks good and the status is not turning to Connected, you should check the diagnostics logs, mainly IKEDiagnosticLog, GatewayDiagnosticLog, and TunnelDiagnosticLog.
In the next blog post, we will discuss designing, implementing, and managing a point-to-site VPN connection.
You can read further about Azure VPN gateways on the Microsoft official documentation page.
You can also read further about Troubleshooting Azure VPN gateways on the Microsoft official documentation page.
4 thoughts on “Design, implement and manage a site-to-site VPN connection (AZ-700)”