In the previous blog post, we covered Azure Site-to-Ste VPN. As part of the Azure AZ-700 Study Guide, this blog post continues with another hybrid networking technology that allows client endpoints to connect to Azure vNet infrastructure. Besides connecting your headquarter and branch office networks to Azure, it is also vital to have an infrastructure to provide connectivity to your mobile users. Using Point-to-Site Virtual Private Network(P2S VPN), client endpoints can connect and use Azure services. You can implement P2S VPN on Route-based Azure VPN gateways and provide a secure connectivity option to your users.

First, we need to identify requirements and environmental dynamics before configuring the P2S VPN on the Azure VPN gateway. Then, based on requirements, we need to choose the suitable P2S VPN protocol and authentication method. There are three protocols that Azure P2S VPN supports.
- Secure Socket Tunneling Protocol(SSTP) is a Microsoft proprietary SSL/TLS-based VPN protocol. SSTP uses TCP port 443 and supports only Windows endpoint devices. SSTP is natively supported on Windows 7 and later.
- OpenVPN is an open-standard SSL/TLS-based VPN protocol. OpenVPN uses TCP port 443 and supports a wide range of endpoints, including Windows, Linux, Mac, iOS, and Andriod. The client for OpenVPN should be downloaded and set up by an Azure-provided configuration file.
- IKEv2 VPN is a standard IPSec VPN protocol. Microsoft and Cisco developed this protocol. IKEv2 VPN uses UDP port 500 and is natively supported by Windows, Mac, and iOS. In addition, because IKEv2 VPN is low CPU intensive, it has a decent performance among VPN protocol options.
Furthermore, we should also plan and choose the proper P2S VPN authentication method. Azure P2S VPN supports three authentication methods.
- Certificate Authentication uses Public-Key Infrastructure(PKI) for authenticating clients. In this method, the Root certificate will be imported to Azure, and the respective Client certificate will be imported to endpoints. This method can also use self-signed credentials.
- Azure AD authentication leverages users defined in Azure Active Directory. Additionally, this method can take advantage of multi-factor authentication(MFA). Native Azure AD authentication is only supported for OpenVPN and Windows 10.
- RADIUS authentication can utilize and integrate with an external identity and authentication server. For example, the RADIUS server can use an On-Premises Active Directory server and is deployed either on Azure vNet or On-Prem. The following figure demonstrates the architecture of the On-Prem RADIUS server.

So based on available endpoints OS, ease of configuration, and performance, we should choose VPN protocol and authentication method.
Since we will use the Certificates for authentication and SSTP, we need to have Root and Client certificates in place. If there is enterprise or commercial CA, you can export the Root CA and create Client certificates. You can also use a self-signed certificate. To generate self-signed certificates for P2S VPN, run the following commands into PowerShell.
$cert = New-SelfSignedCertificate -Type Custom -KeySpec Signature `
-Subject "CN=P2SRoot" -KeyExportPolicy Exportable `
-HashAlgorithm sha256 -KeyLength 2048 `
-CertStoreLocation "Cert:\CurrentUser\MyCerts"  `
-KeyUsageProperty Sign -KeyUsage CertSign


New-SelfSignedCertificate -Type Custom -DnsName P2SClientCert -KeySpec Signature `
-Subject "CN=P2SClientCert1" -KeyExportPolicy Exportable `
-HashAlgorithm sha256 -KeyLength 2048 `
-CertStoreLocation "Cert:\CurrentUser\MyCerts" `
-Signer $cert -TextExtension @("2.5.29.37={text}1.3.6.1.5.5.7.3.2")
After generating the certificates by running the above commands, you need to export the certificates. Then go ahead and open the Root certificate with a text editor and copy the content between -BEGIN CERTIFICATE- and -END CERTIFICATE-.

The last thing to plan is the Address Pool for P2S clients. The address pool should be a non-overlapping IP range with your Azure vNet and On-Prem environment. Since I am using 10.1.0.0/24 as n address space on Azure vNet and 172.30.0.0/16 On-Prem, I will use 172.16.201.0/24 as the address pool. You should make sure you can accommodate enough IP addresses and concurrent users with that Address Pool.
Start implementing Azure P2S VPN, choose your Virtual Network Gateway, and select Point-to-Site configuration under Settings. You can only configure P2S VPN on a Route-based VPN gateway.

On the configuration page, please enter the Address Pool, select Tunnel Type and Authentication type, and finally enter the Root certificate content that we copied in the previous step and click on the Save button.

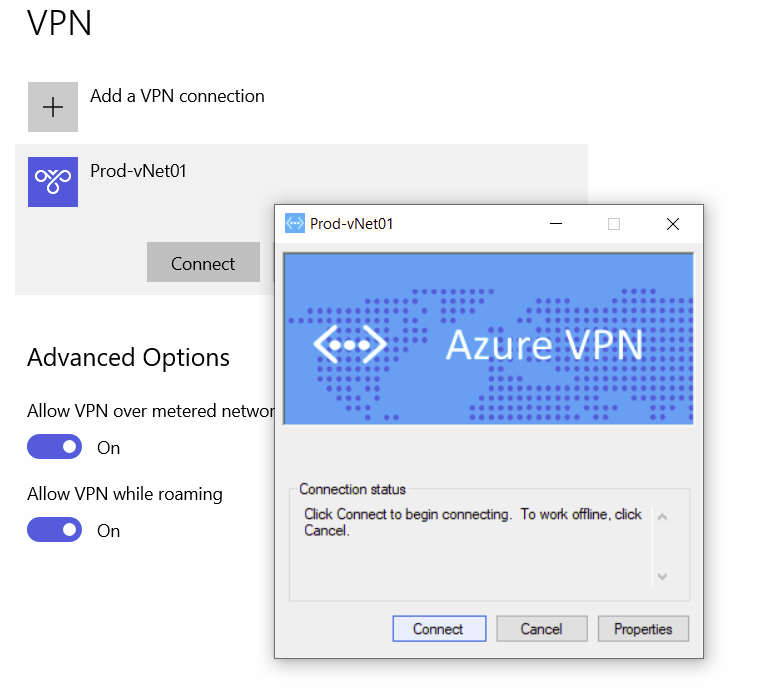
After saving the configuration, you can click on Download VPN Client to receive the required files to configure client endpoints. After this, we need to import the client certificate on the endpoint and run the client execution file retrieved from the Azure portal.
In the next blog post, we will discuss designing, implementing, and managing an Azure ExpressRoute.
You can read further about the Azure P2S VPN connection on the Microsoft official documentation page.
One thought on “Design, implement and manage a Point-to-site VPN connection (AZ-700)”