In two previous posts, we covered Azure Site-to-Site VPN and Point-to-Site VPN. The next objective of AZ-700’s Hybrid networking is designing and deploying Azure ExpressRoute. ExpressRoute is a method to extend your On-Premises network into the Microsoft cloud with the help of ExpressRoute service providers. If you need a private/high-speed connection to access Microsoft cloud services like Azure or Office 365, ExpressRoute is the right solution. This connectivity method doesn’t use the public Internet, and thus it provides higher security, more bandwidth, and higher reliability than Site-to-Site VPN. Many organizations want to avoid public Internet for cloud extension in terms of networking, and here is where ExpressROute could shine as the proper solution. The private connection is provided by specific connectivity partners, and based on your location; you have few options to choose from.
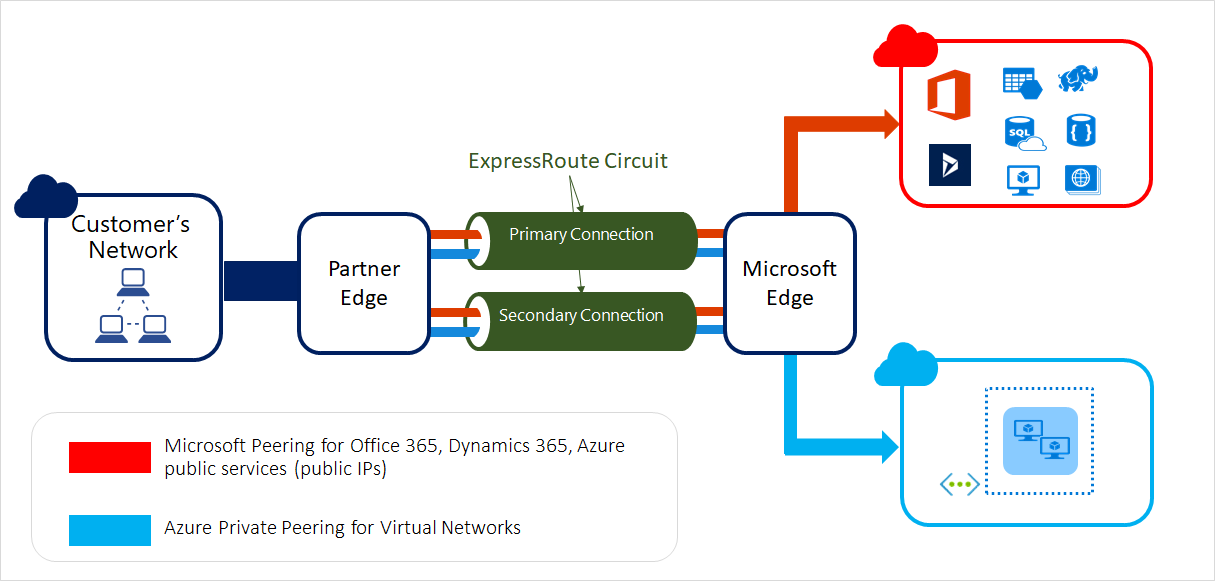
As you can see in the above figure, you can use ExpressRoute to peer to Azure, Office 365, and Dynamics 365. In terms of bandwidth, Azure ExpressRoute could scale from 50Mbps to 100Gbps. This bandwidth scalability works perfectly for those organizations that use Azure for storage, backup, and disaster recovery purposes. Additionally, you can choose between the Service Provider model or Direct model based on bandwidth and isolated connectivity requirements. The below table from Microsoft official documentation compares ExpressRoute Direct and Express Route Service Provider models. The key point is if you need more than 10Gbps, then ExpressRoute Direct is the right solution.

Azure ExpressRoute supports three SKUs, Local, Standard, and Premium. If you plan to use ExpressRoute to connect to multiple Azure Regions, you should avoid Local SKU. The Local SKU at the peering location gives you only access to one or two regions of Azure near the same metro area. On the other hand, Standard SKU gives you access to all Azure regions in geo areas like America, Europe, Middle East, and Asia-Pacific. Ultimately Premium SKU gives you access to all Azure regions globally. It is also worth mentioning that with Local SKU, charging is based on an unlimited data plan, but with Standard and Premium, you can choose between Metered and Unlimited data plans. All inbound data transfer to Azure is free of charge. You can either pay a single fixed monthly fee(Unlimited) or metered data transfer based on your usage for outbound data transfer. You can use Azure Pricing Calculator to figure out the cost difference between various SKUs. On Pricing Calculator, first, choose Networking and then select Azure ExpressRoute to navigate different pricing options.
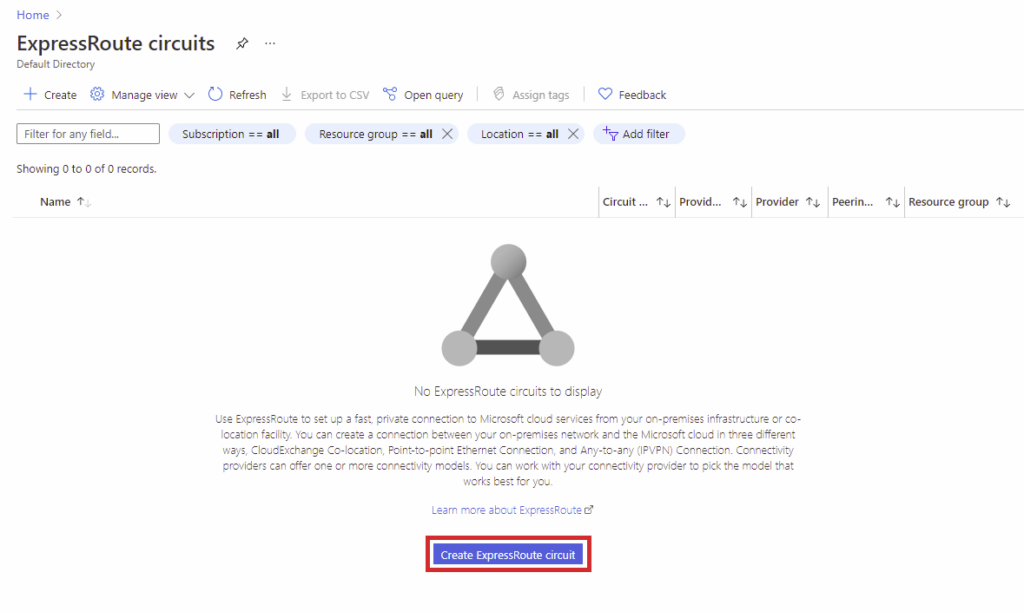
To implement ExpressRoute, in Azure Portal under resources search for ExpressRoute. If you plan to use Service Provider mode choose ExpressRoute circuits, or for Direct mode, select ExpressRoute Direct. I use the Service Provide method, so on the ExpressRoute circuits page, I click on Create ExpressRoute circuit.
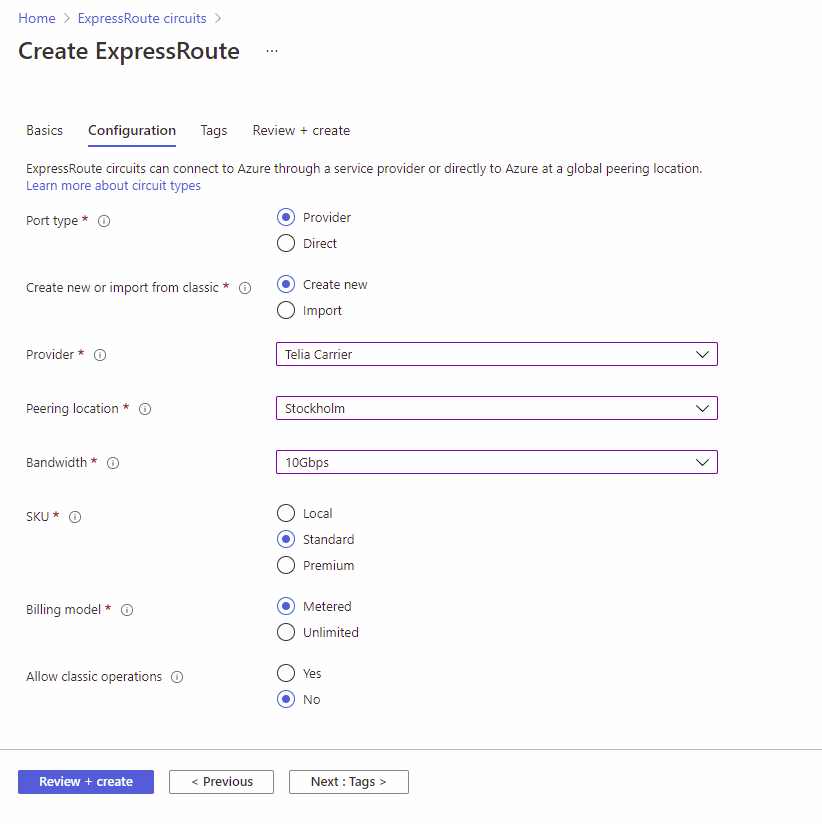
After this, you need to choose your subscription, resource group, region, and you need to name this ER Circuit on the Basics page. Then, you need to choose the ER type, Provide, Location, and Bandwidth on the Configuration tab. Alongside this, you must also select the ER SKU and related Billing model. Then click on Review + create and build the ExpressRoute circuit.
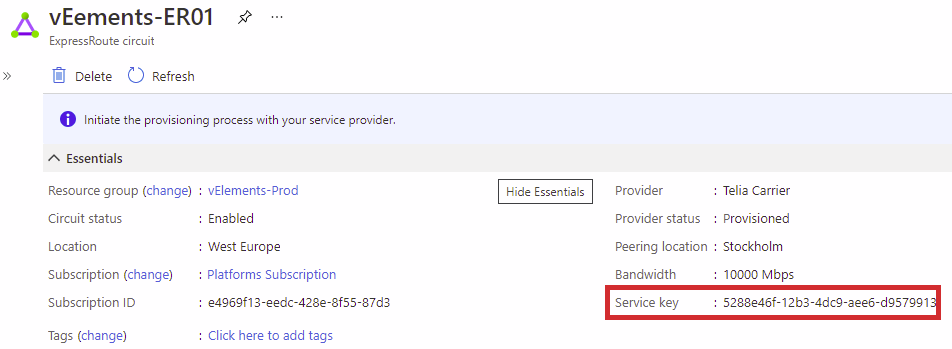
After creating the circuit, you must observe the Service Key from the overview section of the circuit. The service provider needs this service key to configure and provision the circuit.
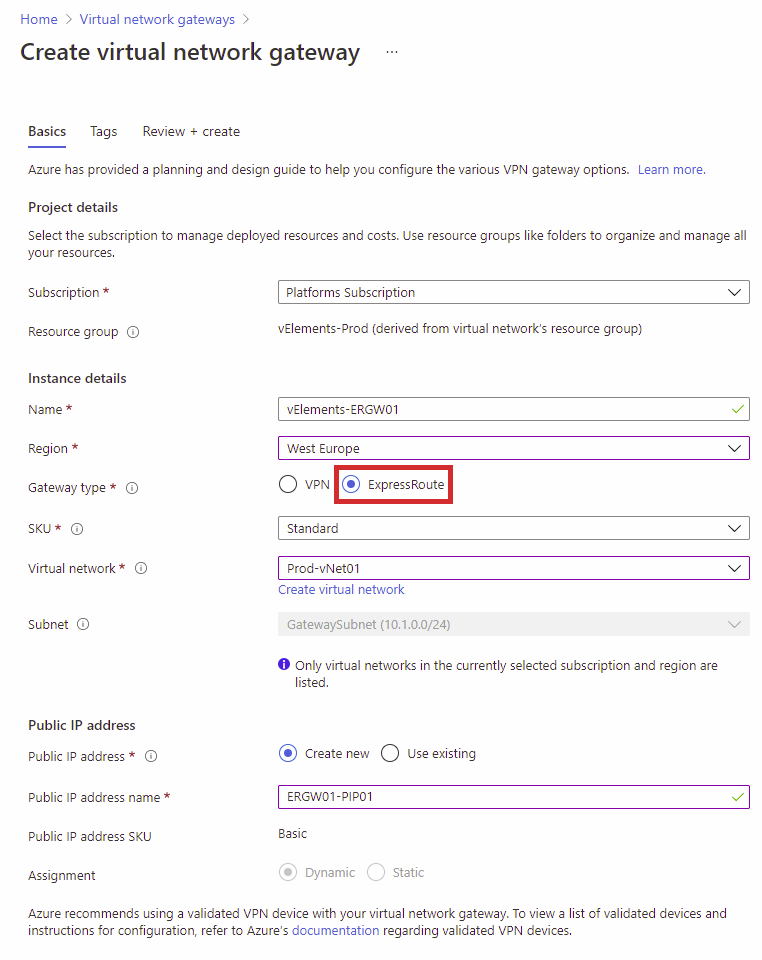
As you remember from the Site-to-Site VPN blog post, Virtual network gateways support two types, VPN and ExpressRoute. So, to continue implementing ExpressRoute, we need to create a gateway with the ExpressRoute type. Like last time in S2S VPN deployment, you need to choose the subscription, resource group, and region. You also need to name the gateway and link it to the respective Azure vNet.
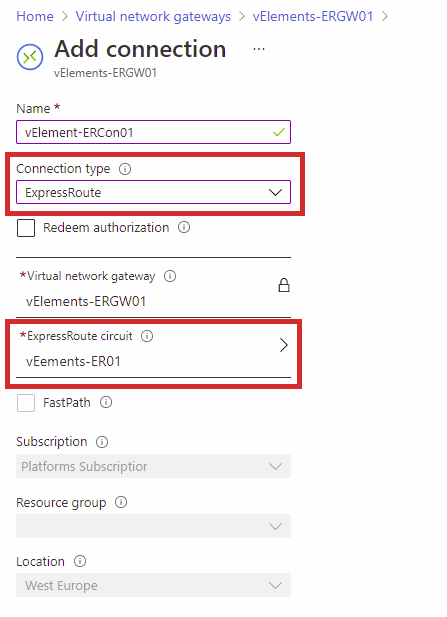
Finally, we need to create a Connection to finalize the ExpressRoute deployment. First, you need to wait for the gateway to getting deployed, and if you remember, it takes 45 to 60 minutes. After that, go to your gateway and select Connections under Settings, and click on Add button. On the Add connection page, select ExpressRoute as type and choose the ExpressRoute Circuit we built in the previous step.
After you hand in the service key to ER provider, you need to wait for the provider to complete its side of the configuration. Then, to verify if the circuit is up and running, you need to check the Provider status, and it needs to be in the Provisioned state.

By covering all three objectives of AZ-700 Hybrid Networking, you can move on to the next section, where we discuss private IP addressing for VNets.
You can read further about the Azure ExpressRoute on the Microsoft official documentation page.
2 thoughts on “Design, implement and manage Azure ExpressRoute (AZ-700)”