Following the first blog post about deployment of vIDM, this post will cover how to configure vIDM and implement NSX-T Role Based Access Control (RBAC) with help of vIDM. As you might noticed, in NSX-T 2.5 and earlier release RBAC cannot be enabled without use of vIDM.
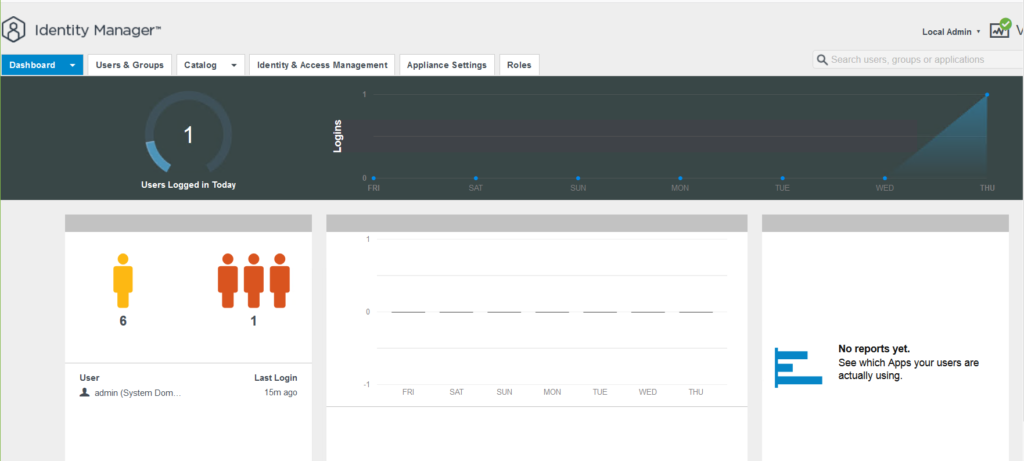
When you login to administration page with vIDM’s admin user account, dashboard would be the fist page you will land. Dashboard contains login information and applications which are used by users and analytics.
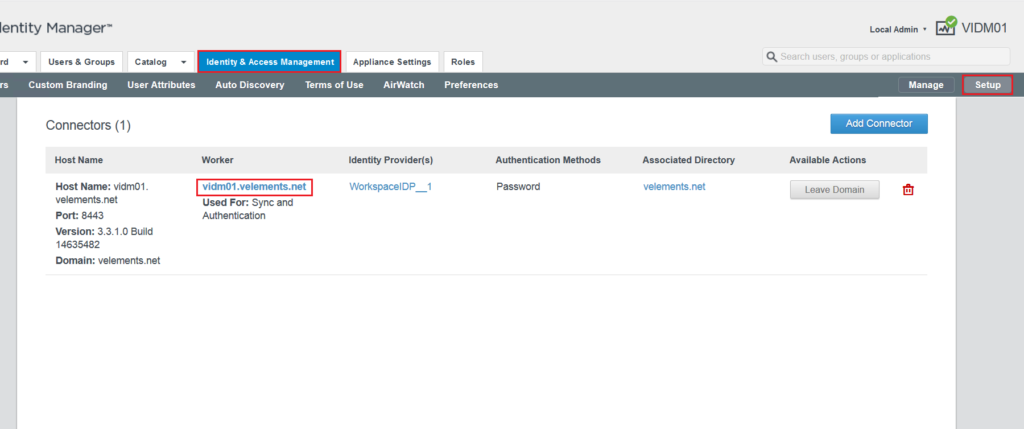
To start vIDM configuration click on Identity & Access Management. Here you can join vIDM to Active directory domain, add directory to sync with vIDM and define user attributes which get synchronized from directory service to vIDM.
By clicking on setup tab, you will be able to join vIDM to Active directory domain.
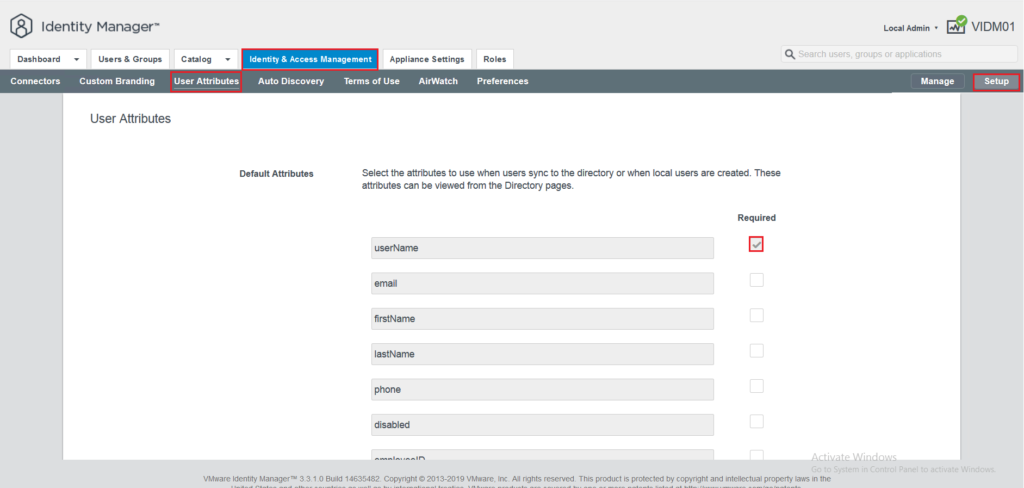
By choosing Setup on the right corner and User attributes from the sub-menu you are able to choose which attributes sync to directory. The default user attributes are specified but you can customize it based on your environment.
Keep in mind that you are not able to change user attributes after directory has been created. Moreover, user attributes that are chosen to get sync with vIDM need to be available in user’s attribute in AD. For instance, if you choose firstName to sync with vIDM and the user does not have the firstName configured in Active Directory it will not sync with the service.
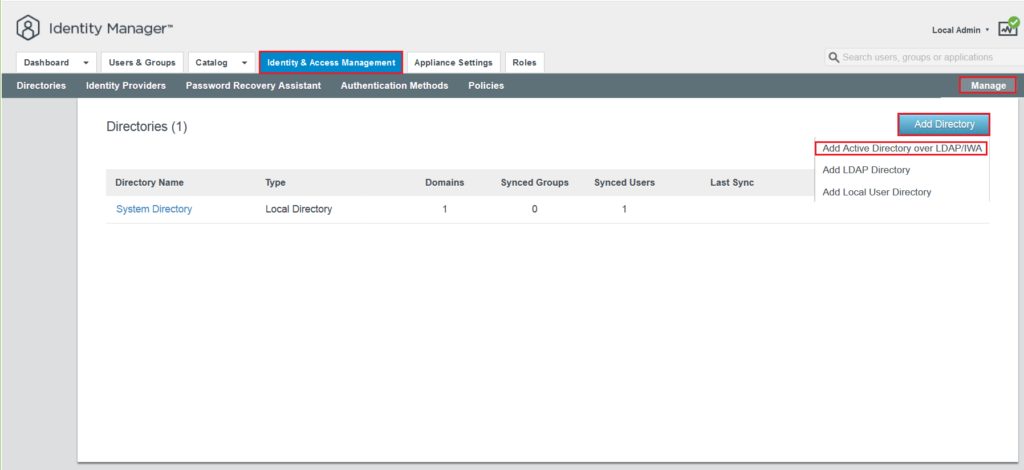
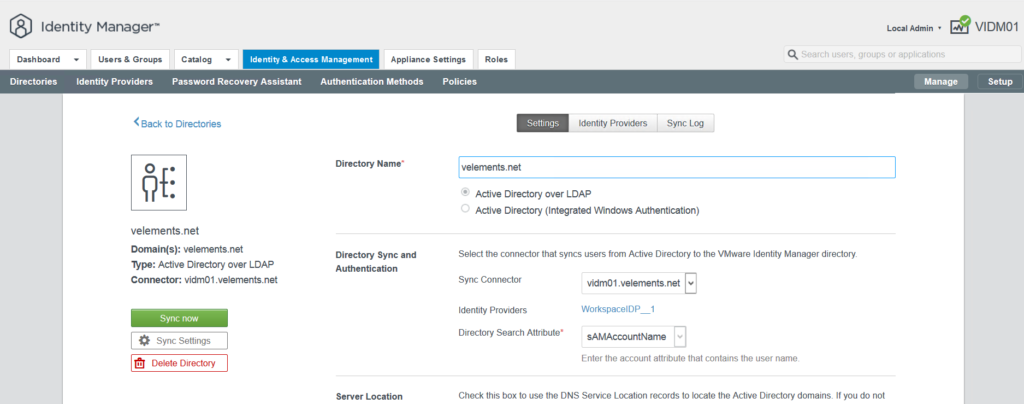
By clicking on Manage tab on the right corner you will be able to add a directory to sync with vIDM.
In next page you need to provide directory name, type and search attributes method in the directory.
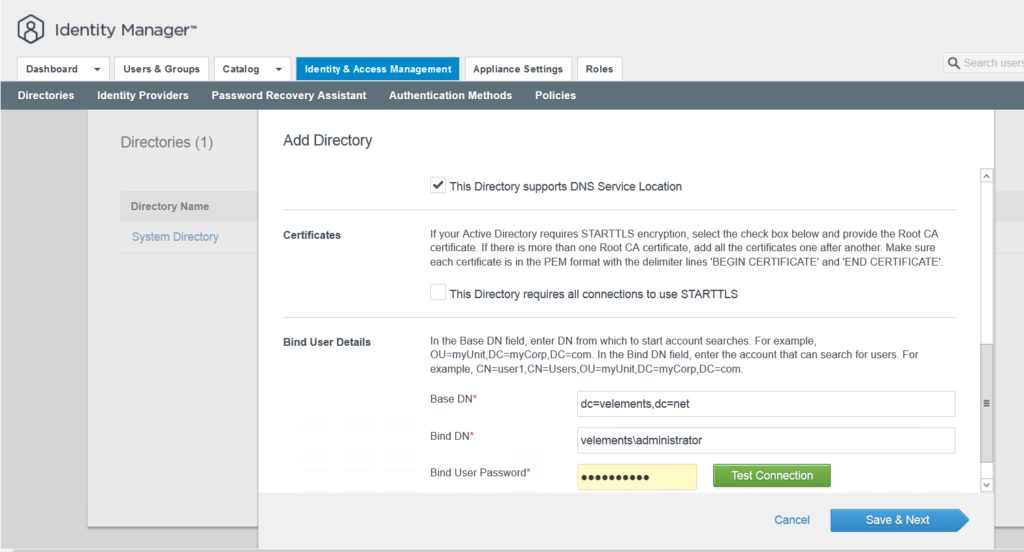
In next phase you need to add Bind user details and click Save and Next.
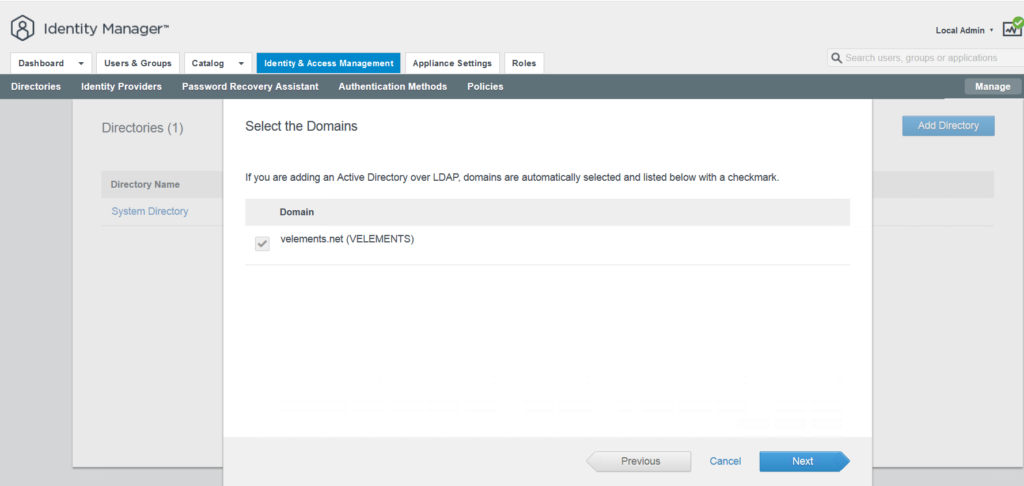
Choose the Domain you want to sync with vIDM and click Next.
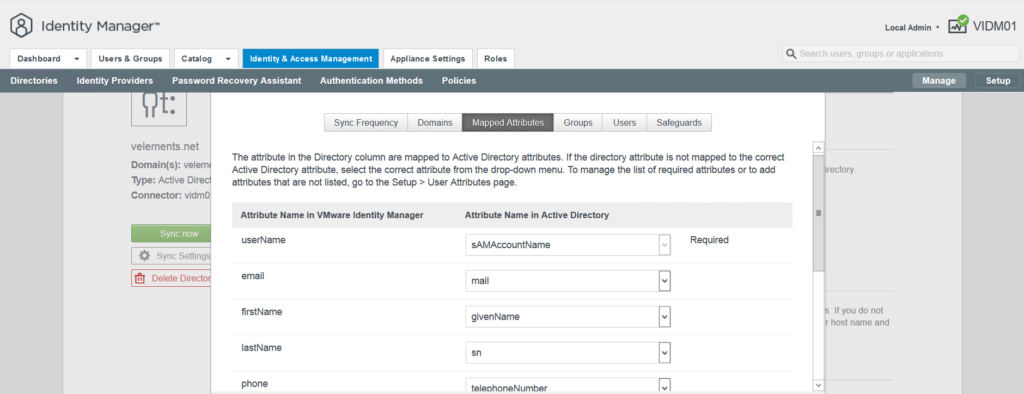
In next page you can see the mapped Attributes that has been chosen in user attribute in earlier steps. In this specific scenario, I only choose userName to sync with vIDM. And then click Next.
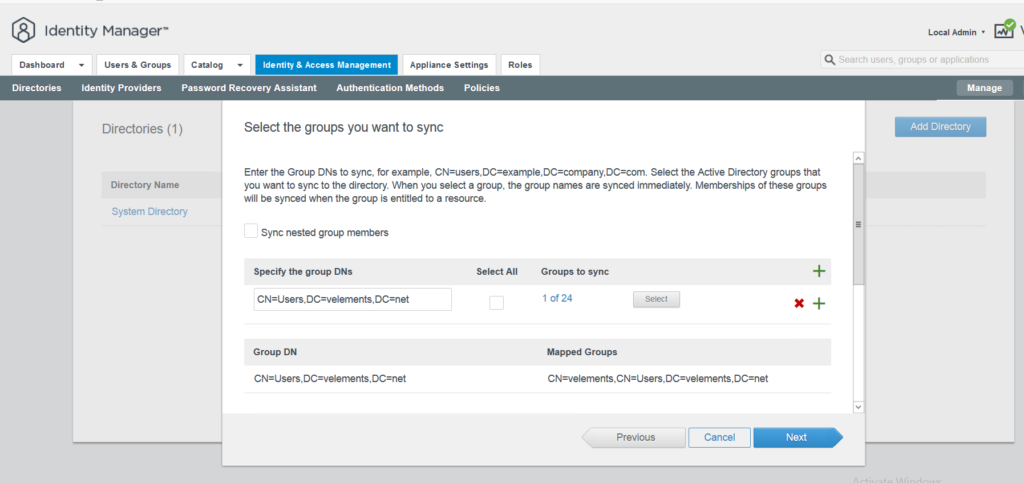
In this page you can select the groups you want to sync but it needs to be the GroupDN and then click Next.
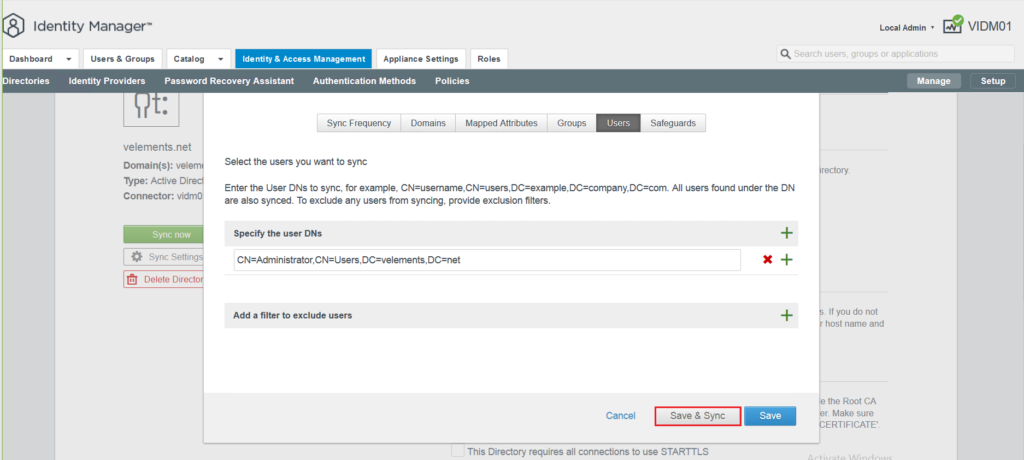
In next page you are able to Sync users and for that purpose you need to add UserDN. Select Save and Sync.
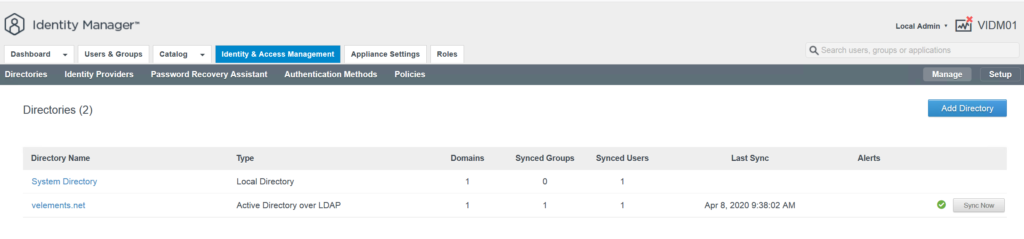
After the groups and users are synced with vIDM in identity and management tab you should be able to see and list them.
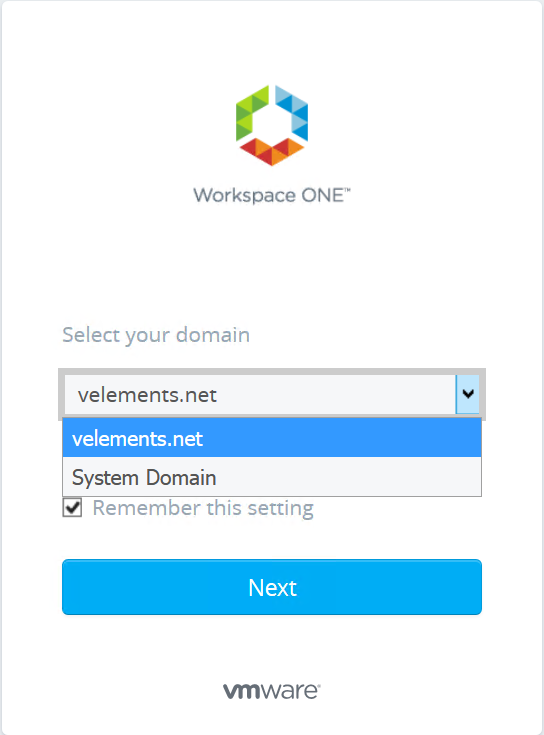
After this configuration, the domain should be also visible at vIDM login page and you can also login to vIDM with a directory user.
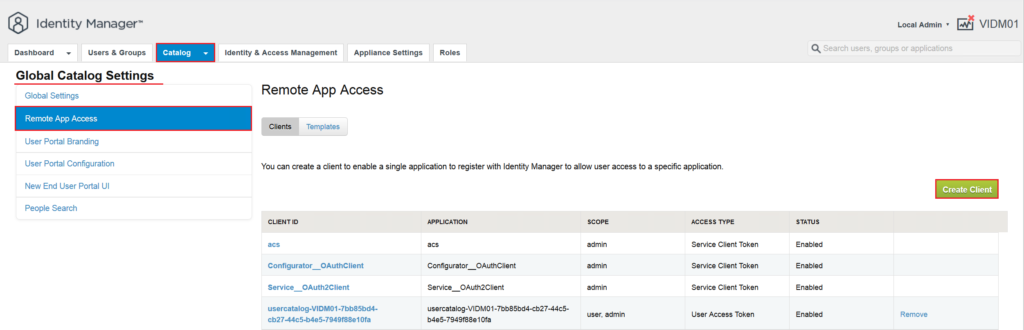
Until now we are done with the initial configuration of vIDM and we can start the integration of NSX-T with vIDM. To start this configuration, first we have to create a OAuth-Client on vIDM. To define an OAuth-Client, go to Catalog -> Settings and choose Remote App Access. Here press Create Client to start the OAuth-Client creation wizard.
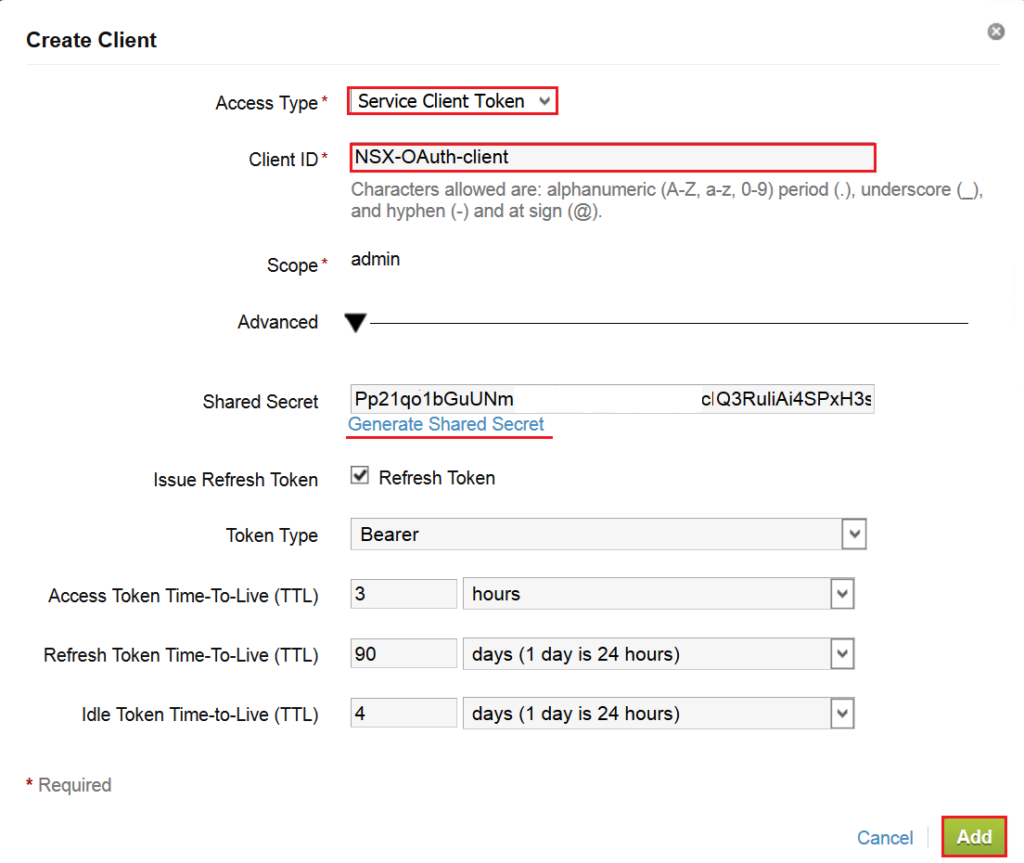
In the wizard choose Service Client Token as Access Type, give it a name for Client ID and click on Generate Shared Secret and click Add. This Shared Secret later will be used on NSX-T vIDM integration configuration.
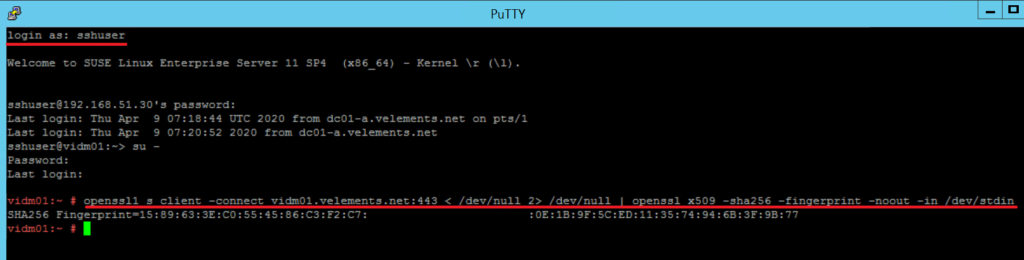
To continue the configuration you should connect to vIDM appliance via SSH to generate SSL thumbprint. Use “sshuser” account with the password that has been configured during initial deployment of vIDM appliance. After login run the following commands.
>su -
#openssl1 s_client -connect <FQDN of vIDM host>:443 < /dev/null 2> /dev/null | openssl x509 -sha256 -fingerprint -noout -in /dev/stdin
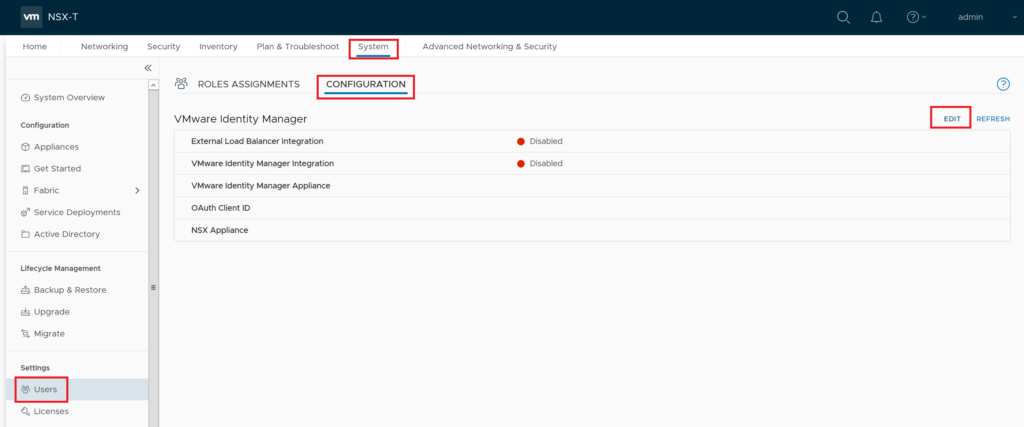
Copy the generated SSL thumprint and login to NSX-T Manager to continue the configuration. Navigate to System -> Users -> Configuration and press Edit to integrate vIDM.
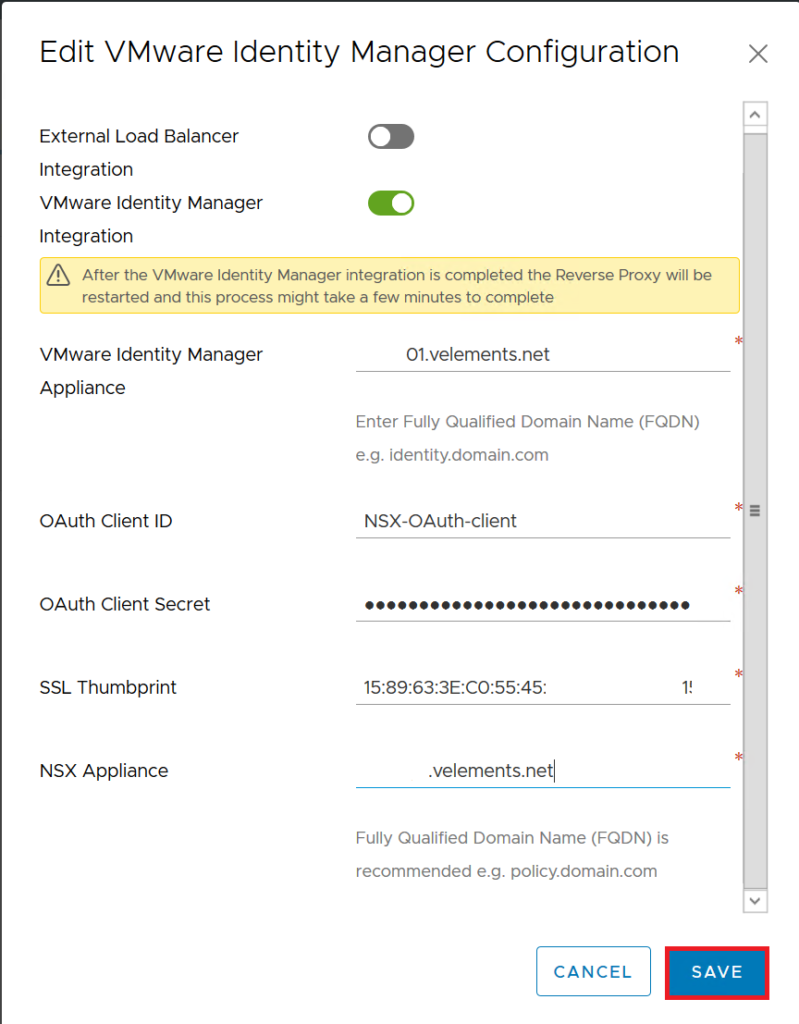
In the Edit page first enable VMware Identity Manager Integration, enter vIDM appliance FQDN, then enter the OAuth-Client ID that has configured in vIDM , and finally enter Share Secret and SSL thumbprint values that gathered in previous steps. Enter NSX-T Manager FQDN and press Save.
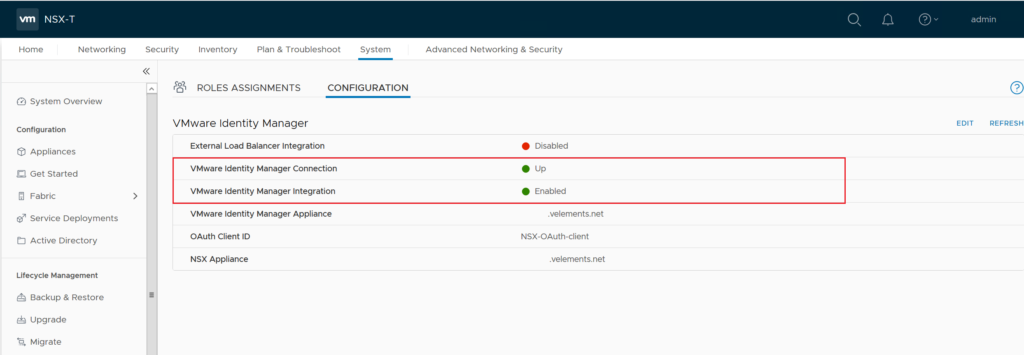
After successful integration of vIDM, you should see Identity Manager’s connection and integration Up and Enables as it shown in below image.
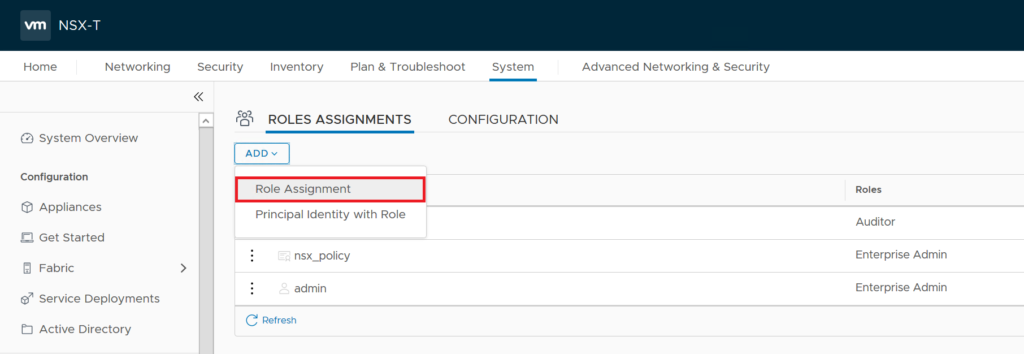
Now we should assign directory users permission to be be able to login to NSX-T Manager. To do this go to Role Assignments tab click on ADD and choose Role Assignment.
In the add user/group text box enter directory username that you want to assign permission and give it a role. Here in this example I added a AD user and give it Enterprise Admin role.

After this user should be able to login to NSX-T Manager with AD user credentials.
Update – April 2020: With introduction of NSX-T 3.0, we can enable RBAC with a direct connection to Active Directory but I strongly believe vIDM integration could give administrators better visibility to login statistics, enable a SSO environment and more importantly take advantage of Multi-Factor Authentication(MFA).
2 thoughts on “Deploying & Configuring VMware Identity Manager (vIDM) – Part 2”