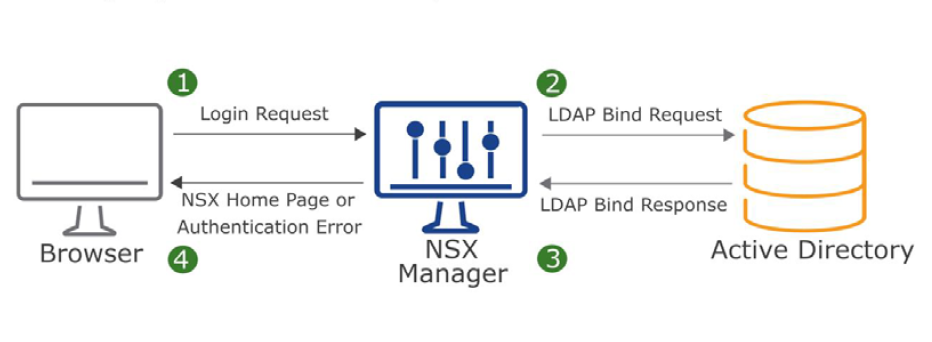
One of the new features which has been added to NSX-T 3.0 is supporting RBAC with Native Active Directory. In previous version of NSX-T we had to use VMware Identity Manager (vIDM) to be able to add users and groups from Active Directory for RBAC purposes. In set posts I have already described how to install and configure vIDM with NSX-T. I still believe configuring RBAC through vIDM has some added value like Multi-Factor Authentication(MFA).
To setup NSX-T Role-based Access Control(RBAC) it’s better to create groups in Active Directory and add users into the group for two reasons. First it’s easier to add a group with couple of users as members rather than assign role to many users in NSX-T. Second, with help of Group Policy you can define a “Restricted Group” and it locks down membership to that group. As a result it provides a layer of security.
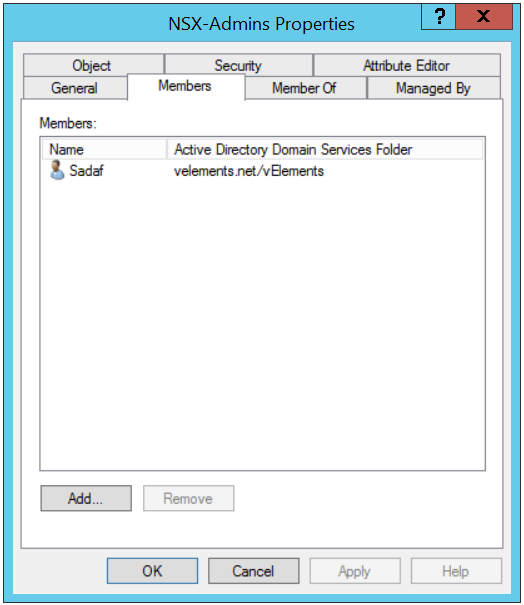
In below screen shot you can see that I have created a group in Active Directory called “NSX-Admins” and I have added my user account as a member in this group.
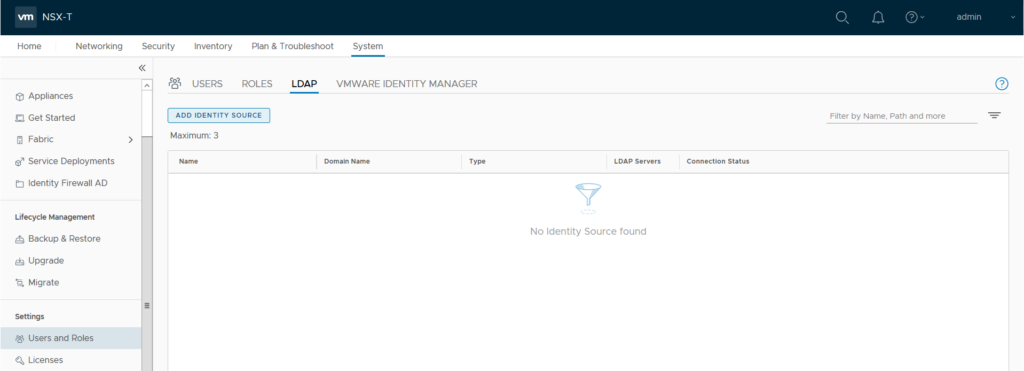
Next you need to login to NSX-T manager Web UI and navigate to System, from left panel menu under Settings choose Users and Roles, select LDAP and click on “Add Identity Source”.
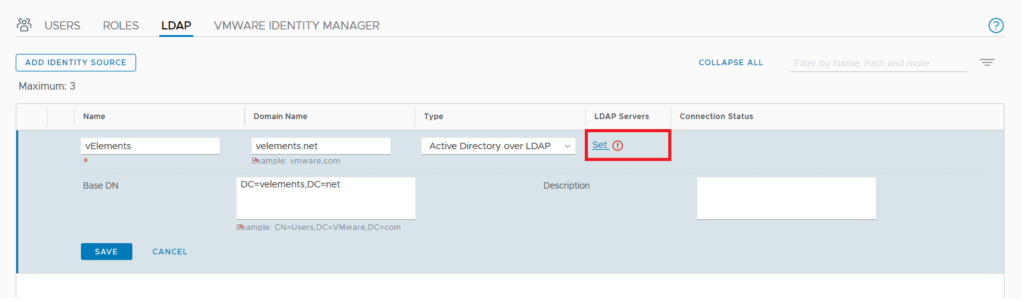
Provide a Identity source Name , Domain Name and choose “Active Directory over LDAP” under type drop-down menu. You also need to add Base DN of your Active Directory Domain. More importantly you need to add your domain controller as LDAP Server. Click on Set to configure your LADP Server.
Here you can add your domain controller and choose LDAP or LDAPS as the protocol and also enter user credentials in the mentioned domain.
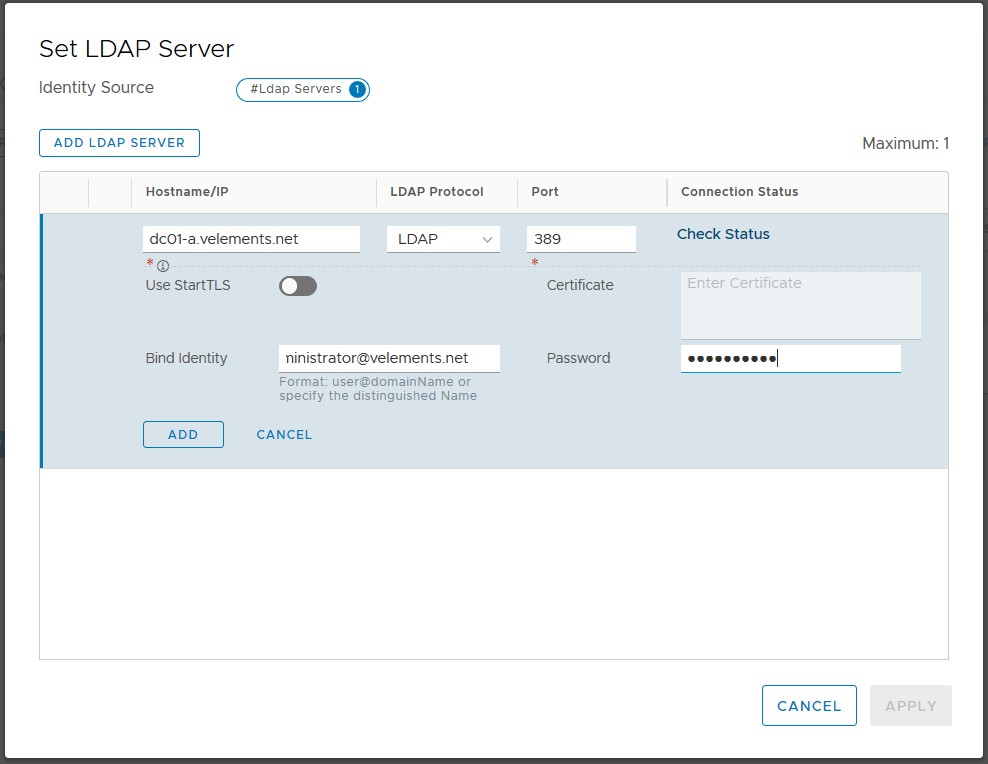
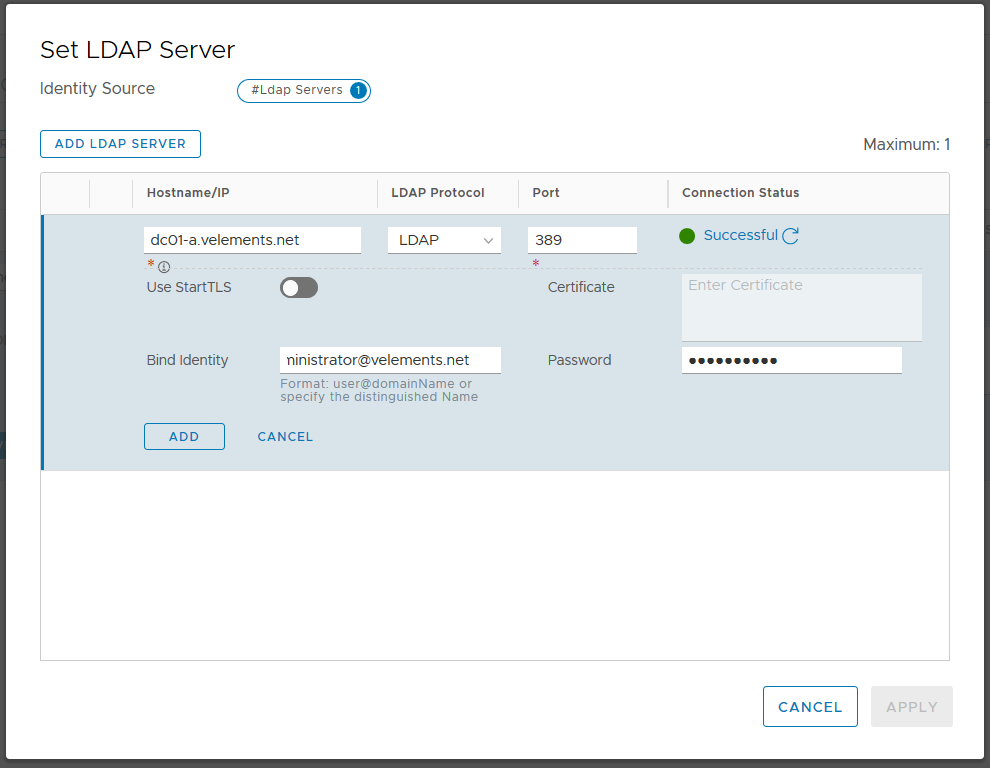
Before you add the LDAP server you can check Connection Status. You should see the Connection Status as Successful and then go ahead and click on ADD and APPLY.
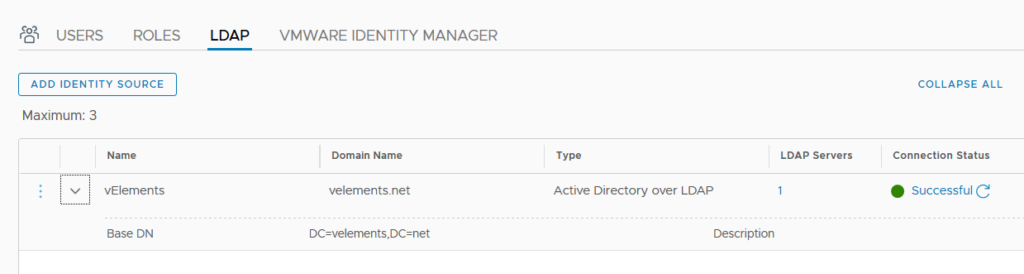
Note: You are able to add only one domain controller per Identity source. You can add more domain controllers by use of extra Identity Source. You can add up to three Identity Sources with the same domain name but different domain controllers Hostname/IP address.
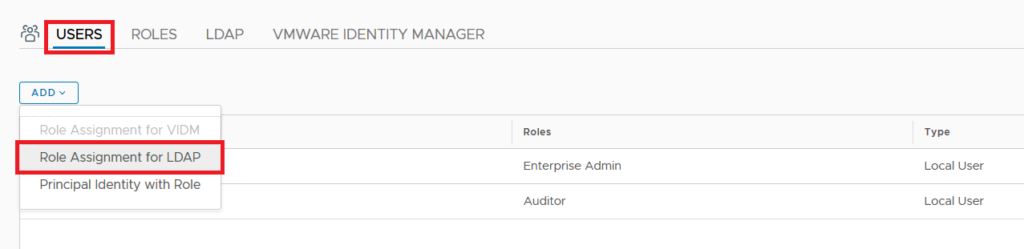
After successfully adding the LDAP server you should be able to add users and groups in NSX-T and assign role to them. For this purpose choose Users and select ADD and choose “Role Assignment for LDAP”
Select the identity source from drop down menu and select the group name , lastly assign a designated Role and click save. Here I choose Enterprise Admin which gives full control to that group. You can find out a detailed description of each NSX-T Role here.

Now you are able to login with users who are member of added Active directory group in NSX-T as you seen in two below screen-shots.
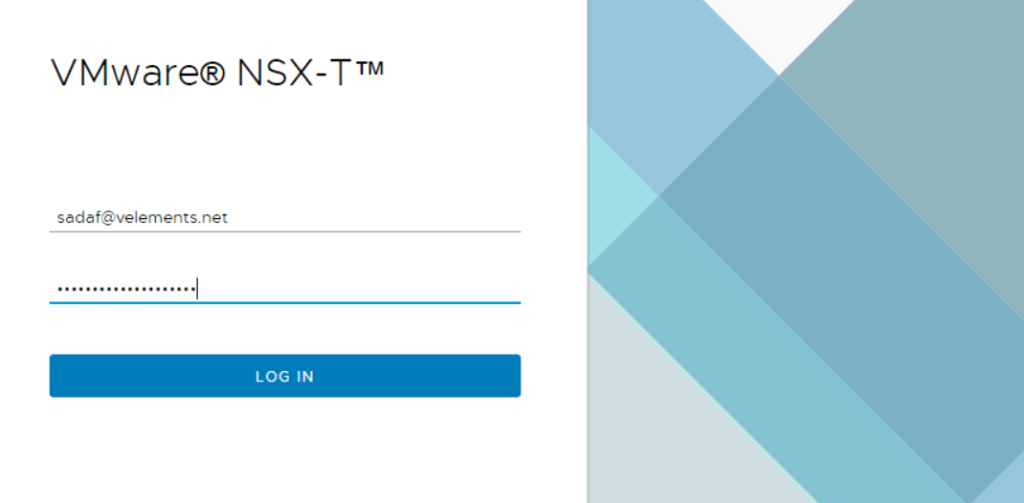
Here you can see that I successfully login with my domain user account rather than built in Admin account.

Now when we have configured LDAP integration with NSX-T, we can replace NSX-T SSL certificates optionally and we can continue with Transport Node configuration.
One thought on “Configure NSX-T 3.0 RBAC with Native Active Directory Integration”