In Part 1 of NSX-T SSL Certificate Replacement, the process of certificate template preparation and request has been explained. This blog post will teach you how to import and replace the generated certificate into NSX-T Manager. It is really important to verify the imported certificate before replacing it. I want to point out that if you are using a Virtual IP for you NSX-T management cluster, you should have generated the SSL certificate for management cluster’s Virtual IP address.

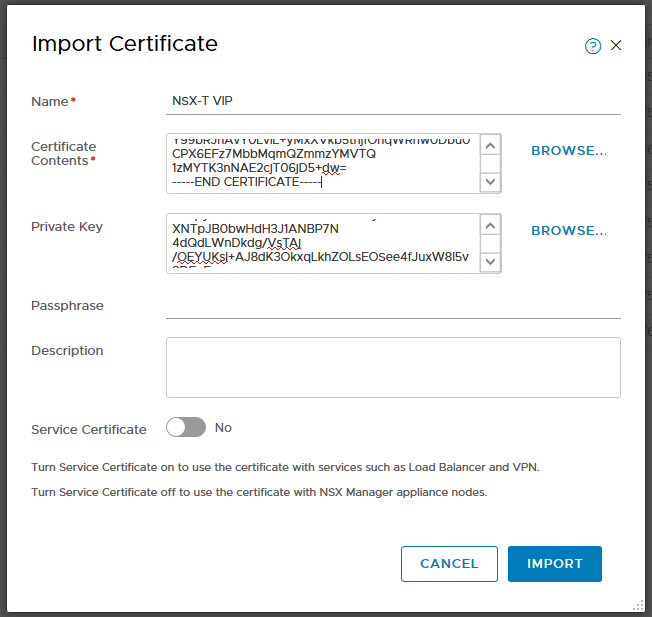
To begin go to NSX-T Web UI, click on System tab and on the left panel under Settings choose Certificates. On Certificate tab, under Import, choose Import Certificate. Here you should copy the content of VIP & CA certificates into Certificate Contents box and copy content of Private Key , “nsxt-vip.key” in my case , into Private Key box. Use the following model to copy Certificates into Certificate Contents box. Make sure you have also turned off the Service Certificate option and click on Import.

Certificate Contents insert structure;
—–BEGIN CERTIFICATE—–
NSX-T VIP Cert
—–END CERTIFICATE—–
—–BEGIN CERTIFICATE—–
CA Cert
—–END CERTIFICATE—–
Now certificate should be available in certificate store and we should verify the imported certificate now. To run the verification, we need Certificate ID which is visible in the same page.

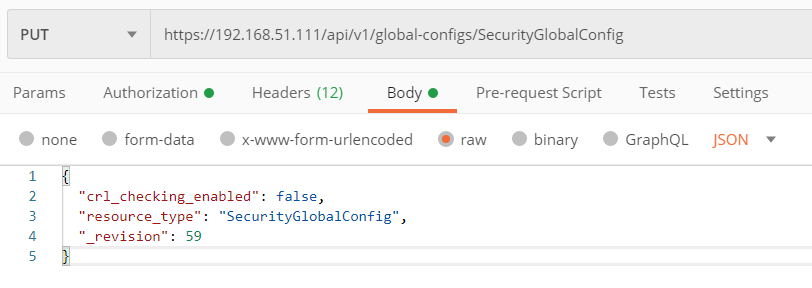
Here is also very tricky because before running validation command, you need to disable Certification Revocation List(CRL) checking. As it also explained in VMware KB78794 , you can run the following REST API call to disable CRL checking.
PUT https://<nsx-mgr>/api/v1/global-configs/SecurityGlobalConfig
Use below body for above PUT REST API Call.
{
“crl_checking_enabled” : false,
“_revision” : <Revision number taken from GET output>
}
After disabling the CRL check, now you can verify the imported certificate. Just copy the certificate ID and use it for to run the following API call.
GET https://<nsx-mgr>/api/v1/trust-management/certificates/<certificate-id>?action=validate
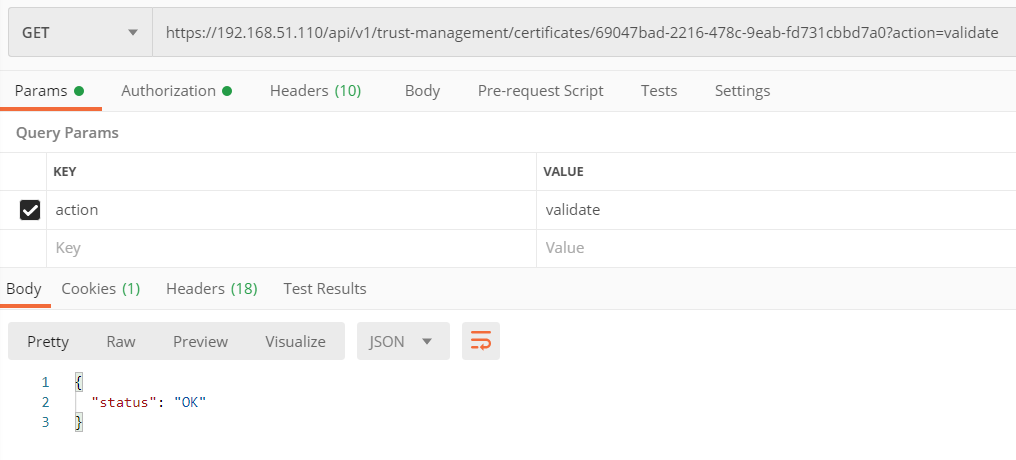
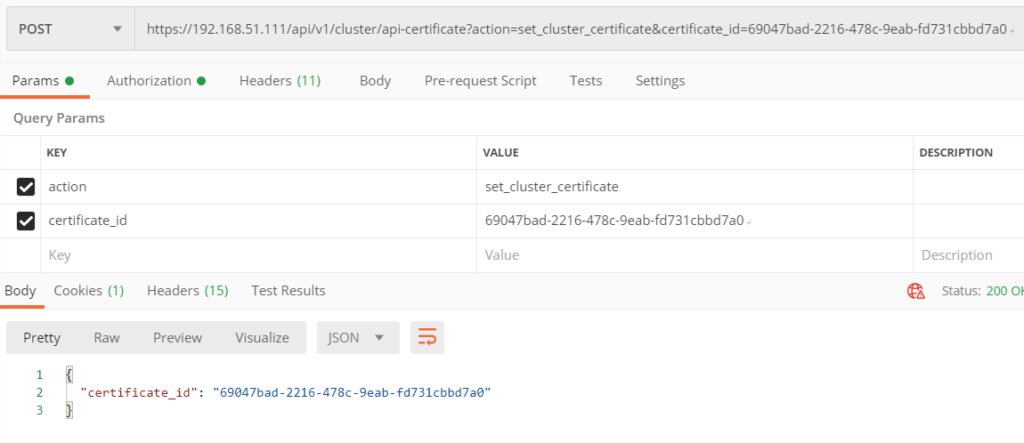
If you get OK Status on the verification, go ahead and run the below API Call to replace the certificate.
POST https://<nsx-mgr>/api/v1/cluster/api-certificate?action=set_cluster_certificate&certificate_id={Cert-ID}
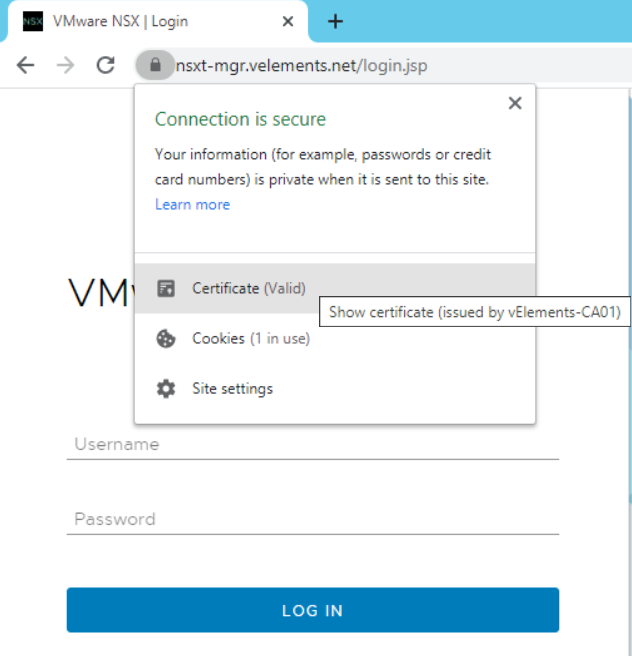
After all these steps, now when I open a browser and enter NSX-T Manager VIP there wouldn’t be any certificate warning.
Now with implementing NSX-T Management cluster and replacing SSL certificate, we can go ahead and prepare ESXi hosts as Transport Nodes(TNs).
One thought on “NSX-T 3.0 SSL Certificate Replacement – Part 2”